Taking it to the skies

Taking it to the skies

I will be taking it to the skies was the comment made by a well known Gyrocopter owner & pilot.

Gyrocopters are not your everyday flying machine but they have a strong international sub culture who have ozone for blood. It was August 2017 and this fellow had heard about our Products from word of mouth recommendation so he came looking for us at our secret test hideout.  we of course asked him how he managed to find us. He said we were not so hard to find.

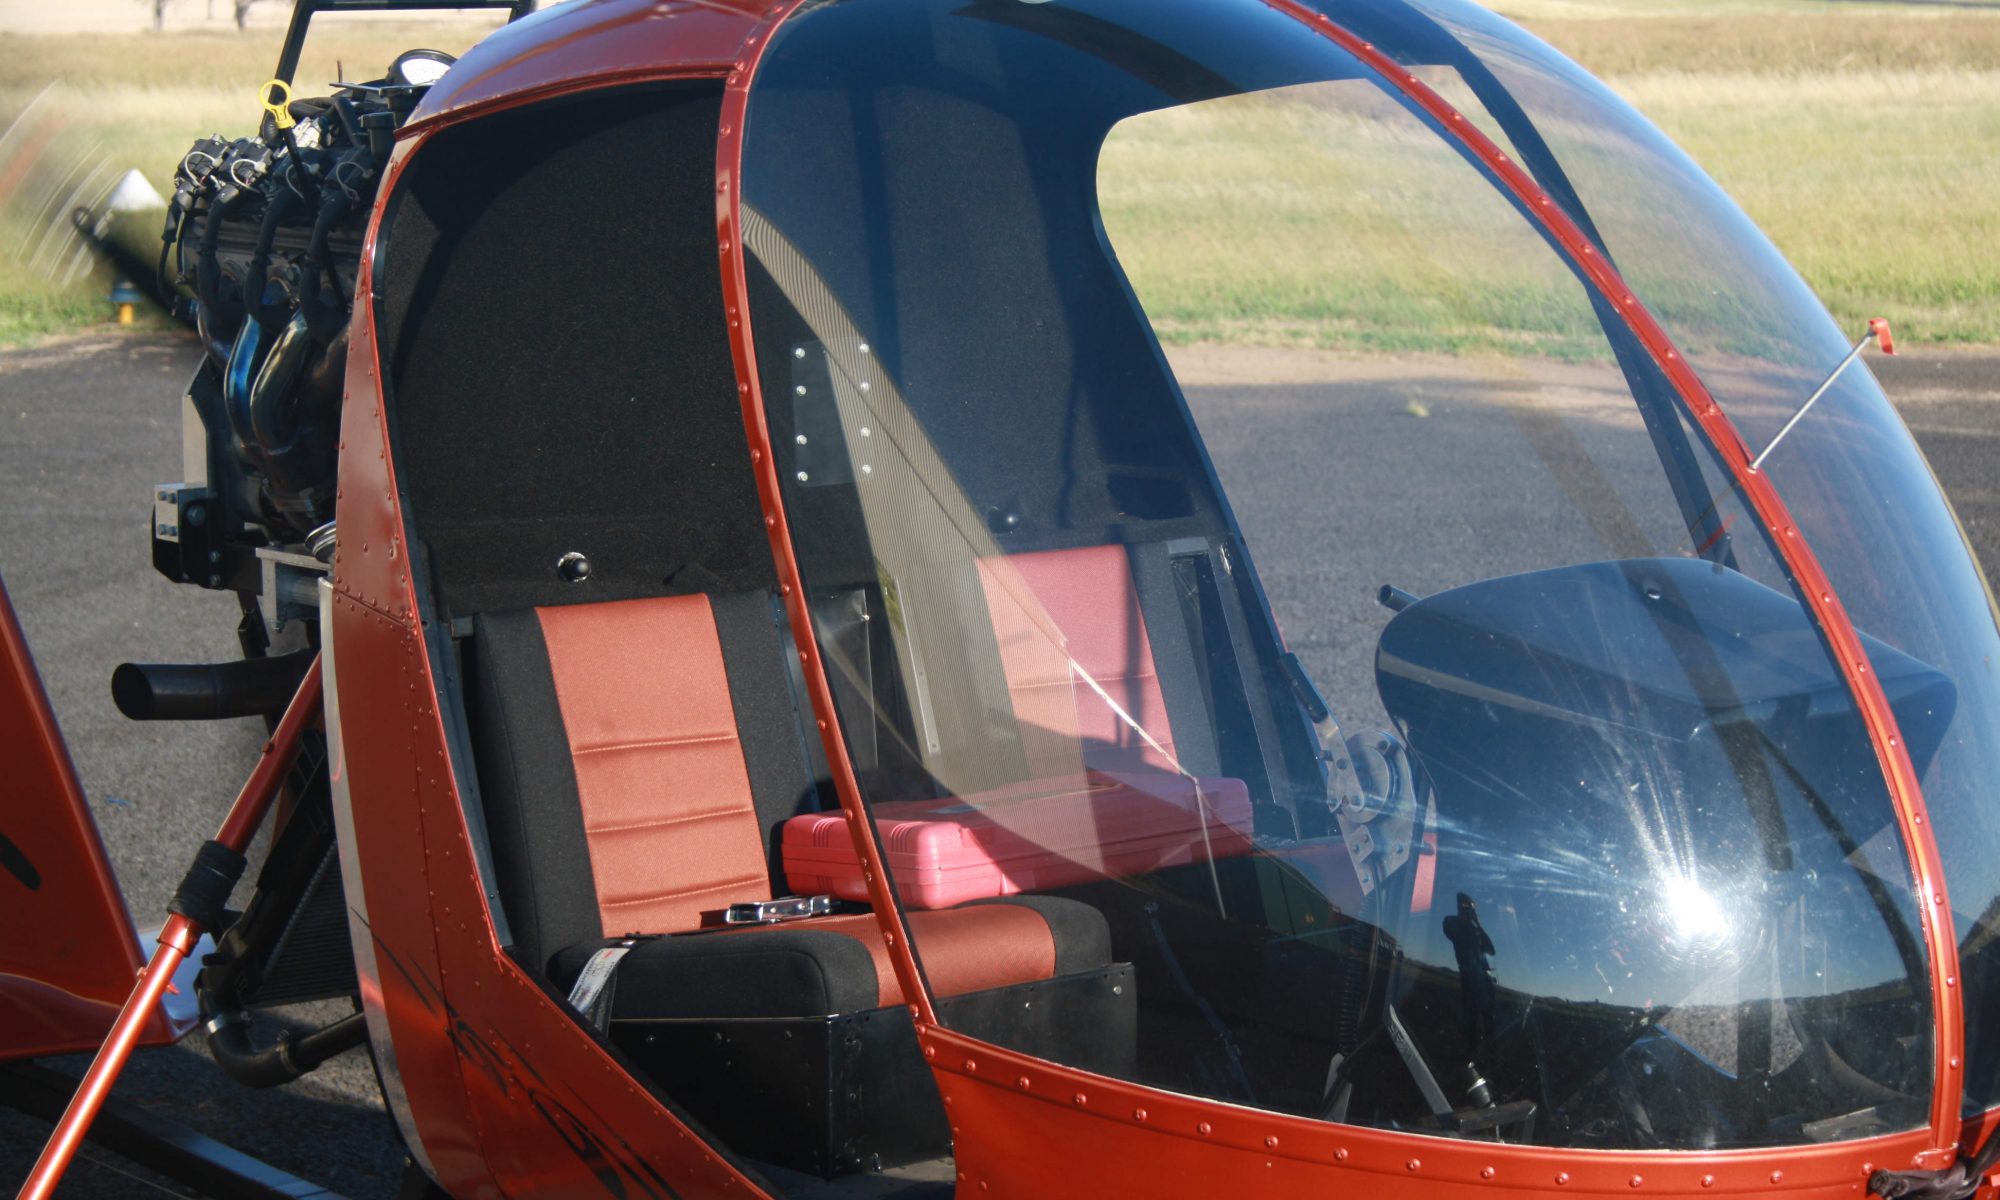
He wanted to protect his recently completed canopy version gyro which was fitted with a LS1 chevy engine and carbon fibre propulsion blade. This is the Hypercar of the Gyrocopter world with a big investment so it needed to be kept in perfect condition

So we of course said yes we will do it and planned a time to meet at the airstrip, which was a good hour drive away. On getting there we found all sorts of flying machines which was fascinating to walk around and check them out.

This blog will run for 12 months as we track the quality of the work carried out and the how the owner felt NDG coatings performed over the 12 months.

Taking it to the skies
Gyrocopter waits for us to do our work

Right,  what are we there for: To look at what products we would apply to this machine. 

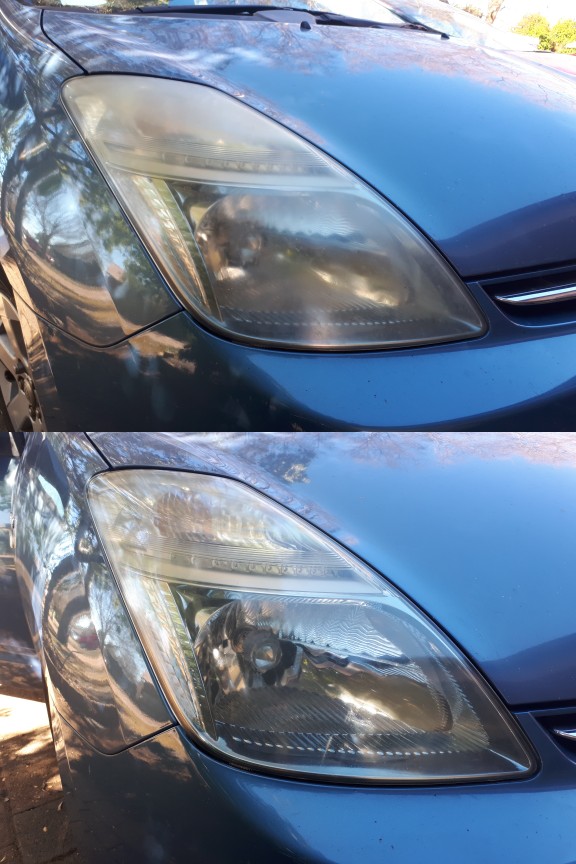
The windscreen we decided on shield 120

The Blades we would use our champion product that is our special tool Hyperseal.

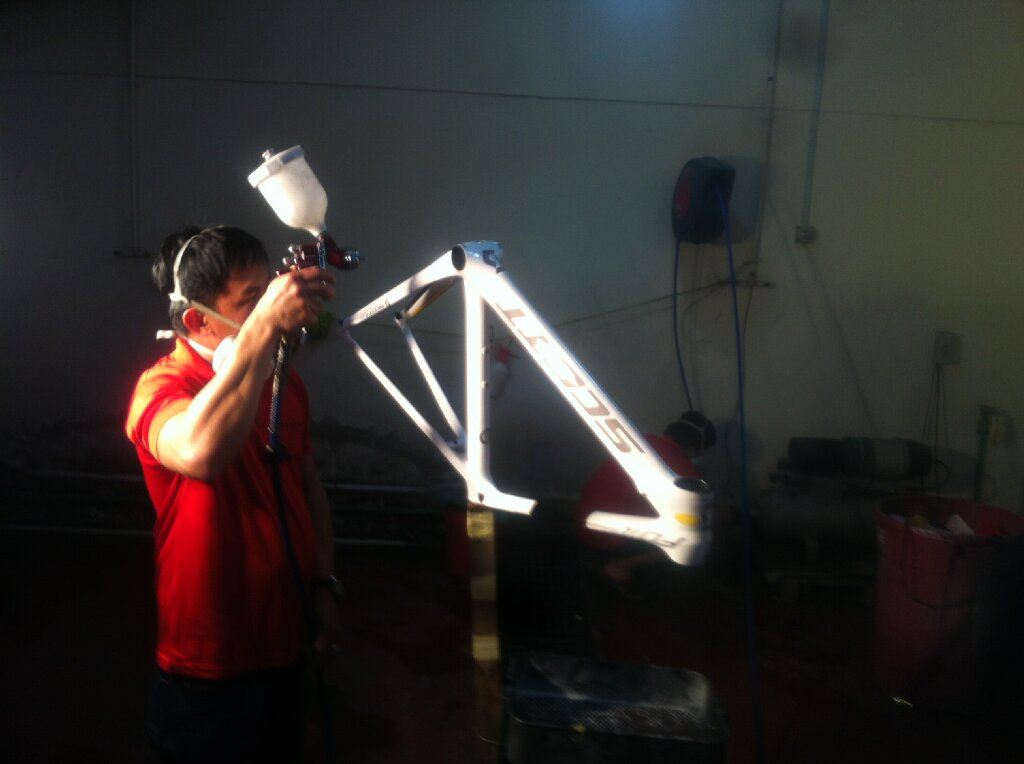
We set up and got started. The paintwork had recently been applied so no significant paint corrections were needed.

Just as we finished the wind started to pickup so the owner quickly got into his flying machine and took to the skies.

On returning he commented on the clarity of the visuals of the windscreen and the smooth feel to the canopy and was very happy with the whole process. So we shook hands and scheduled to return in August 2018.

Taking it to the skies
The mighty LS1

Taking it to the skies

August 2018

12 months have passed since we had seen the Gyrocopter and we headed out to the Airstrip to take a look and have a chat to the owner.

On arriving we found that there was a new, larger hanger to house the Gyro so he still had it and not felt compelled to sell it during this time

The gyro looked the same as when we had coated it. 

The owner said he was very pleased with NDG products and he recommends it to anyone he meets as to him we had ticked all his wants and needs boxes and his expectations were met.

He says that the bug/insects are much easier to clean off the windshields and that all he needs to do is wipe the whole machine with a clean cloth and it looks good as new.

Taking it to the skies
Gyro 12 months on, August 2018


Copyright ©2016 Nano DG Singapore Pte. Ltd. All Rights Reserved

Hands-on experiment DIY Style

Hands-on experiment DIY Style

During our product development process we use focus groups and live off the street people to test our processes so we grab a young couple who were in the street and in exchange for their services gave them a bag of NDG car care goodies.

We we wanted them to do was read some very basic instructions on applying Hyperseal to their car and then go for it with him working on one side and her on the other. Our objective was to backup our claim that NDG Hyperseal is truely a DIY (Do it yourself).

It was an interesting exercise as what we were looking for was can you get the same result using your own style?


Hands-on experiment DIY Style 

So how did they go?

Besides the very difference of opinion as to the right technique and the wrong it was all pretty straight forward.  We were asked to give an opinion as to who did the best work? It could have been a diplomatic answer but we hands down said that her work was the best.

Bottom line in this experiment was that it really doesn’t matter what technique you use you will still get a great result with our Hyperseal.

NDG HYPERSEAL IS A TRUE DIY NANO COATING

You can by Hyperseal here 

Hands-on experiment DIY Style
A bit of territory encroachment
Hands-on experiment DIY Style
Who did this side we wonder, SPOT ON
Hands-on experiment DIY Style
SPOT ON!

Hands-on experiment DIY Style Hands-on experiment DIY Style


NDG Hyperseal 


Copyright ©2016 Nano DG Singapore Pte. Ltd. All Rights Reserved

NDG’s 2014 Summary

NDG's 2014 Summary

2014 has been our biggest growth period with most of that being through the launch of our NDG Self Healing coatings. Our testing and product development is going leaps and bounds and we have many new and innovative products being readied to launch in the coming 24months.

The market acceptance of our brand and products has been excellent.

Below are just some images of some of the projects we have done this year.

NDG's 2014 Summary NDG's 2014 Summary

Long term bike testing, NDG's 2014 Summary NDG's 2014 Summary NDG's 2014 Summary NDG's 2014 Summary NDG's 2014 Summary NDG's 2014 Summary NDG's 2014 Summary NDG's 2014 Summary NDG's 2014 Summary NDG's 2014 Summary

 Hyperseal, NDG's 2014 Summary

NDG's 2014 Summary NDG's 2014 Summary NDG's 2014 Summary NDG's 2014 Summary NDG's 2014 Summary NDG's 2014 Summary NDG's 2014 Summary

NDG's 2014 Summary

NDG's 2014 Summary NDG's 2014 Summary Road test across the USA, NDG's 2014 Summary NDG's 2014 Summary

NDG's 2014 Summary


Copyright Nano Development Group Inc. 2013

First cross country test USA

First cross country test USA

2013 was our first fore-ray into the Nanoscopic world and what we found was very intriguing and we wanted to know more but in order to understand what it was we needed to live with for some time and this is what we did.

One of the very early products for cars was a ceramic coating which we were unsure how to take it to market and fully explain what it did so we do what all car guys do and go on a road trip.

The car we used was and Oxford green 1998 BMW 740IL, perfect for what we wanted to do as that colour shows any marks, blemishes, and any soiling so we starting in Florida we coated the car with the Nano ceramic coating, nano tire shine and windscreen coating, packed up,  and headed  on a 3,200 mile drive west toward Los Angeles.

We took our time doing the crossing taking 7 days to step foot on Santa Monica pier via Las Vegas. This was the BMW’s 10th transcontinental USA crossing so we had a good feel for any changes in the way the car performed.

Here is what we found

  1. Fuel economy had improved. The car always got 26 MPG but we noticed that we got a solid 28MPG with the coating on the car
  2. The claim of not needing to wash your car again was not accurate. The car still got dirty as it normally would but it was far easier to clean
  3. The ceramic coating did give the paintwork depth and made the metalic flakes shine more
  4. The windscreen coating didn’t work as we were told, that it repelled rain but we did find that it was much easier to clean off bug splatter and that rain drop dispelled very well and the windshield wipers were much quieter
  5. The tire shine didn’t last 2 days so we count that as a non-starter.
First cross country test USA
Starting point Boca Raton FL
First cross country test USA
I10 Louisiana
First cross country test USA
2 day visit to the SEMA show Las Vegas
First cross country test USA
The Beauty of Sedona AZ
First cross country test USA
Show favourite SEMA 2013
First cross country test USA
SEMA Show 2013
First cross country test USA
SEMA Show 2013
First cross country test USA
Every 6.5 minutes a train passes
First cross country test USA
I10 New Mexico
First cross country test USA
SEMA Show 2013

First cross country test USA First cross country test USA First cross country test USA First cross country test USA First cross country test USA First cross country test USA First cross country test USA 

First cross country test USA
BMW @ Military Aircraft Graveyard

First cross country test USA 

After this trip we saw that the products although good they were not great. we believed that they could be made great so we formed Nano Development Group and from that the Brand NDG.

We employed a chemical engineer who specialised in Nano technologies and started on the long expensive road to product development.

We plan to expand our testing to other parts of the world and develop products that are DIY in their application rather than products that need to have specialist applicators.

Stay tuned for further blogs.

Copyright Nano Development Group Inc. 2013

NDG Self Healing explained

NDG Self Healing explained

Dubai UAE 2014 launch

We launched NDG products into Dubai in 2014 leading with our Self Healing coating for cars. What we didn’t expect was the resounding success that was ahead of us. The market responded and we were inundated with cars waiting for some NDG Self Healing.

The idea and function of the Self Healing coating is that once it is applied, not only is is super glossy it has the ability to heal itself when heat is applied to it.

Since this time we have applied the coating to many hundreds of cars and boat hulls (above the waterline).

This video shows how it works

Here are some FAQ’s

  • The coating is not a DIY product. Applicators can only apply it once they are properly trained and certified by NDG training staff.
  • NDG Self Healing is not available in all countries
  • NDG Self Healing coating will heal itself when heat is applied. It will not heal the painted surface itself
  • NDG Self Healing abilities are for light scratches and swirls that are commonly found on paintwork
  • NDG Self Healing is suitable for high end Luxury, Super and Hyper and Classic show type cars
  • Can it replace standard clear coat? It is not recommended (we do produce a clear coat alternative self healing coating but it takes particular training to apply it correctly)
  • How long does the Self Healing last? It is an intrinsic chemical formula which means that the very composition of the chemistry means that the healing ability is built into it. There is no set timeframe as to the life span of it’s ability. It is therefore important to have the coating checked annually for performance quality
  • What happens when an accident repair is required? The coating does not hinder the repair process like glass or ceramic coatings do. simply have the repair carried out and then the NDG Self Healing can be reapplied to that panel
  • Will the self healing affect a vehicles warranty? It is important to check this out in your country and vehicle importer as they have variations in rules for this in each country and this is  one of the reasons we do not sell to some countries is because of this issue. It does not just affect NDG Self Healing it is all permanent coatings of any type. We produced NDG Hyperseal for this reason as it is a polish rather than a coating. NDG Hyperseal
  • Will Self Healing change the colour and definition of my car’s paintwork? No the colour will not change, the definition may, meaning that on darker coloured cars more depth to the surface may be apparent
  • How do I become a qualified applicator? We host training courses annually. send us a request for information via our contact page for further information
NDG Self Healing explained
Lamborghini’s & NDG Self healing is a perfect fit
NDG Self Healing explained
An example of NDG Self Healing

Copyright ©2016 Nano DG Singapore Pte. Ltd. All Rights Reserved

Ex-Rental Motorhome makeover

Many rental motorhomes make it to private owners once they have been sold off by the rental companies.

These ex-rental units make great value buys for their new owners and one of the reasons they are sold off cheap is that even though they have had their corporate branding removed it is still clearly visible.  The oxidisation of the body paintwork makes this branding indelible and close to impossible to get rid of.

The owner of this campervan had heard of our successes with restoration of very bad paintwork. This to us is great as word of mouth references are the best for of reference.

So what did this owner want?

He ad owned it for several years and he wanted all the shadow branding removed from all sides of the van as he looks at it ever time he looks at the van and on top of that people comment everwhere he goes and that really annoyed him.

Ex-Rental Motorhome makeover
Overlap of new and old lettering and Branding


Badly deteriorated decals have to go.
Very obvious shaddow branding in big letters
Ex-Rental Motorhome makeover
Opposing direction of stripes makes for a serious challenge


OK, we get to work

  1. We carefully remove the non essential lettering from the body
  2. claybar and wash the body with NDG Mega Gloss wash and NDG Aggressive claybar
  3. We then bring out the big guns and rotary cut the body with NDG Nano Diamond compound
  4. Mega Gloss wash the residue off the surface
  5. Wet the surfaces and applied NDG Hyperseal
  6. After 60 minutes we rotary buff the body on medium speed using a waffle pad

The challenges we faced

  1. were that the stripes on the side were running the opposite direction to the original branding stripes and intersected in several places this took extra skills to get this right without damaging the new stripes
  2. Very difficult to navigate around all the compartment doors, windows and conduit where most of the oxidisation had occurred.
  3. Owners arrived to find the results far better than they expected

The end result

The campervan was restored to it’s off the showroom condition which is something we wanted to achieve.

The owner said, “Sensational result. It will put my mind at rest not to turn and look at the van hoping not to see the shaddow branding. THANK YOU!

Ex-Rental Motorhome makeover
That Showroom Gloss

Ex-Rental Motorhome makeover

End


Hyundai Tucson makes a solid come back

Hyundai Tucson makes a solid come back

Hyundai Tucson makes a solid come back

There is always a danger of buying cars on auction as you really don’t get a sense of what the car has been through in it’s life and, in this case the heading “Hyundai Tucson makes a solid come back” is an understatement as this car has been beaten on. A 2005 model city car which somehow ended up at the car auctions and then to us to see what we could do with it.

We will do all this work using DIY techniques and NDG Products. There will be a significant amount of mechanical work to do carried out and to keep the cost realistic as will look for a low millage donor car to source the parts. But our mission is to get this car looking and smelling as close to showroom condition as possible. We have given ourselves a week to complete this project. Is it even possible?

At first look we see

  1. That it was a smokers car so heavy smoking smell and it has been beaten on for some years, very run down with layers and layers of problems
  2. Light beige interior with significant black marks all over the seats and nicotine smells and discolouration from smoking
  3. Cracked centre armrest and heavily soiled
  4. Steering wheel airbag damaged and worn trim
  5. Driver’s seat torn
  6. Worn gear leaver trim
  7. Fuse panel exposed (not a good sign)
  8. Lettering missing off rear hatch door
  9. ABS light on
  10. Radiator leaking and coolant all over the ABS pump and underside of the car (has been leaking for some time)
  11. Valve lifters ticking
  12. Idler pulley noisy causing drive belt system squeal
  13. Power steering pump reservoir hoses swollen and rubbing on serpentine belt
  14. Belt tensioner noisy
  15. Engine bay layered in typical city driving soiling
  16. Paintwork dull and covered in light scratches
  17. Headlights crazed and have been restored some time in the distant past
  18. Rubbish quality window tint causing poor vision clarity
  19. Some sort of oxidisation in spare wheel well ( needs more investigating)
  20. Auto transmission fluid brownish colour
  21. Tyres worn and spare tyre bald
  22. Car drives straight and no wheel bearing or unusual driveline noises and surprisingly no evidence of accident damage or repairs
Hyundai Tucson makes a solid come back
Headlights need a good NDG restoration
Hyundai Tucson makes a solid come back
Very dirty interior, black hand prints everywhere. Bio Crystal Magic for them
Hyundai Tucson makes a solid come back
Badly stained seat trim

Hyundai Tucson makes a solid come back
Engine bay has typical city driving buildup and some horrible noises coming from the drive belt side.


Hyundai Tucson makes a solid come back
Paintwork is very dull and covered in swirl marks from automatic carwashes
Hyundai Tucson makes a solid come back
Something must have spilt into the wheel well and is growing crystals

Plan of attack

  1. Find a donor car
  2. Diagnose ABS fault
  3. Find source of coolant leak
  4. Clean engine bay and solve engine ticking and belt system squeal
  5. Change engine and transmission fluids and filters
  6. Claybar body to see how much paint correction is required
  7. Cut and polish body
  8. NDG Hyperseal treatment
  9. Clean and restore the interior neutralising the smokers smell
  10. Restore the headlights

Work process

  1. Donor car found (in local wrecking yard)
  2. Removed parts from donor car. Radiator, thermostate, ABS pump, serpentine belt, idler pulley, belt tensioner, abs switch, drivers seat, steering wheel and airbag, luggage security panel, spare wheel, rear hatch lettering, center console and arm rest, body clips and other small trim pieces
  3. Clay bar body
  4. Cut & polish
  5. Mega Gloss Wash
  6. NDG Hyperseal treatment
  7. NDG Acidic engine bay degreaser and pressure clean
  8. Replaced radiator and thermostate
  9. Replaced idler pulley, tensioner and belt (inspected timing belt)
  10. Replaced ABS pump and switch
  11. Cleaned spare wheel well and installed new spare wheel
  12. Carried out NDG Headlight restoration process
  13. Changed engine & transmission oil and filters
  14. Removed all seats, cleaned with NDG Bio Crystal Magic and removed stains from carpet
  15. Replaced Drivers seat, centre console and armrest and steering wheel
  16. Finished off  engine bay with NDG Engine lacquer
Hyundai Tucson makes a solid come back
Donor car found
Hyundai Tucson makes a solid come back
Removal of the interior to clean the years of nicotine smoke and clean the carpet

The results 4 days later

According to the owner: “Simply amazing, the car looks new, cannot believe it, you sure it is the same car?”

Hyundai Tucson makes a solid come back
The perfect straight off the Showroom floor look
Hyundai Tucson makes a solid come back
Picture was taken before the U was added into Hyundai. But look at that shine


Hyundai Tucson makes a solid come back
Paintwork looks great using DIY techniques to apply NDG Hyperseal
Hyundai Tucson makes a solid come back
This image says it all. LIKE NEW!
Hyundai Tucson makes a solid come back
NDG Headlight DIY restoration/rectification processes worked perfectly
Hyundai Tucson makes a solid come back
Fingernail scratching eliminated and replaced with that Newly painted look and feel. Hyperseal treatment sorted this.
Hyundai Tucson makes a solid come back
The seats were blackened through years of exposure to smoking
Hyundai Tucson makes a solid come back
Hyperseal is the perfect plastic restorer
Hyundai Tucson makes a solid come back
The wheel well had a bottle of soda leak into it which had crystalised and discoloured the surface

Hyundai Tucson makes a solid come back  

In summary

The car is a new as it will ever look and considering that everything done to the car was all done as DIY techniques just as it would in any driveway anywhere. We have worked hard to ensure that NDG products are truely DIY and that you can tackle projects as deep as this and get a great result.

This Hyundai was a great project. It was in a very bad way when we received it and there were doubts as to whether it could be restored, but 4 part days later we got not just a great result we got a perfect result. The car looks close to new condition, and smells just like a new car would with our soon to be released odour neutraliser which installs that showroom new car smell. Keep and eye out for that one as we will be launching it in November 2018.

Hyundai Tucson makes a solid come back
Yep,,, Looks new again
Hyundai Tucson makes a solid come back
The perfect finish

End

Copyright ©2018 Nano DG Singapore Pte. Ltd. All Rights Reserved


DIY Head restoration/rectification

DIY Headlight restoration/rectification

Headlight restoration kits are available everywhere and are priced to motivate the DIY market to buy and try their luck on getting the desired result, clear headlight lenses. The problem is that most if not all of these kits give a great result but it is short lived.

The issue with headlight lenses that once they have been restored with a quick and easy DIY headlight restoration kit is that you cannot use them a second time and expect a good result, in-fact you can very easily destroy the lens. The legacy of using these kits is that in the preparation process you sand to etch the crazing/discolouration off the lens before applying the clear-coat.

The grit is pretty course that leaves deep sanding etching in the lens.  This etching is where the challenge begins as it is very hard to get a clear lens on a 2nd restoration and even harder to get a restoration to last the service life of the car.

Typical headlight issues that occur after an off the counter DIY headlight restoration

  • Hazing
DIY Head restoration/rectification
Hazing
  • Crazing
DIY Headlight restoration/rectification
Crazing
  • Severe Etching
DIY Headlight restoration/rectification
Severe etching

The NDG Process.


What you need

  1. Bucket of clean water
  2. Waterproof gloves
  3. Chamois and 2 x micro fibre cloth pieces
  4. 1 sheet of 400 grit Wet & Dry cut in to 10cm * 10cm pieces
  5. 1 sheet of 800 grit Wet & Dry cut in to 10cm * 10cm pieces
  6. 1 sheet of 2500+ grit Wet & Dry cut in to 10cm * 10cm pieces
  7. 5ml of NDG Hyperseal or NDG shield 120 or NDG Screen Shield

Here is what to do

Starting with 400, wet one piece and starting on the most etched damaged area on the lens start sanding in a linear motion with heavy pressure and insuring the 400 grit stays wet but dipping into the water to clean and keep wet.  Change 400 grit pieces when sanding effect is diminished.

Keep sanding until the scratching noise reduces significantly and the residue starts to turn white. Wipe the lens to see how it looks and that the major scratching has been reduced significantly.

Using 800 grit with the same process and hard pressure keep sanding the entire lens wiping clear occasionally to see the clarity of the lens. Keep sanding and clearing until the lens looks very clear when wet.

Using 2500 grit and using the same methods as the other grits you start the finishing process. Keep sanding and wiping until no visible etching, crazing of disscolouration. Wet the lens with clear water and wipe down to check on the clarity and quality of finish. (if you need to touch up areas start the process of the more agressive grit papers as required)

Once you are satisfied with the finish wash the lens with water and prepare a clean piece of Microfibre or other lint free cloth and apply a small amount (coin size) and wipe onto the entire lens.

Leave Hyperseal to settle for 3 to 5 minutes before buffing clear with a clean mocrofibre or other lint free cloth or a buff machine with a soft pad.

Now your lens will be good for several years, if not longer. Recommended best practices is to apply Hyperseal to the lens every 2 to 3 years to ensure continued protection.

DIY Headlight restoration

Copyright ©2016 Nano DG Singapore Pte. Ltd. All Rights Reserved

Matte Vinyl Wrap Restoration

Matte Vinyl Wrap Restoration

We have always claimed that our Hyperseal is an excellent coating for Vinyl wrapped cars. Here we have photographed a recent job that was on a late 2000’s BMW 740il that has had a metal flaked matte vinyl wrapping for approximately 6 years.

First inspection of the wrap showed that bird droppings had left their permanent mark on the horizontal surfaces and that the Suns UV rays had dried out the same surfaces.  The metal flakes were very dull and the surface looked 1 dimensional.

There were several large scratch marks on the Boot/Trunk lid possibly from shopping bags or boxes being dragged on or off but other than that the wrap adhesion was as good as ever.

The restoration plan.

The plan was to restore the wrap to look unified in it’s appearance and the original Metallic flake Matte look.

First we washed the car with Mega Gloss Wash to clean the surface well

Using a waffle pad and an orbital buffing machine on low speed applied Hyperseal to the horizontal services and hand applied Hyperseal after misting all the panels with water to the vertical surfaces and left to settle for 30 minutes.

Using the same pad and machine on midrange speed we buffed the excess Hyperseal.

The Bonnet/Hood and Boot/Trunk took some work. The dryness was worse than it first seemed so it took 3 coats of Hyperseal & polishing process to get the look and feel of a newly wrapped car in all it’s glory.

The owner was beyond happy with the result and so were we.

The end result.

Matte Vinyl Wrap Restoration

Matte Vinyl Wrap Restoration

Matte Vinyl Wrap Restoration

Matte Vinyl Wrap Restoration

Matte Vinyl Wrap Restoration

End

Copyright ©2018 Nano DG Singapore Pte. Ltd. All Rights Reserved

It was all too hard

Someone somewhere is saying this very thing every minute of every day for just about any subject you could think of. In this case it was a 1994 306 Peugeot that we had been told had broken down on a nearby highway and the nearest place to get help was a farm with a farmer who had some mechanical know how, but not enough to get the 306 running again. So there it sat in his farm shed ever since, for some years.

We spotted it on a visit to the farm while there for another reason, but it caught our eye. Why? the car seemed out of place against the rest of the items on the farm. We worked a tentative deal with the farmer pending on whether the car started. We did an assessment of the car to see what it would take to get it back on to the road. Below is our initial list.

First look list

  1. Fuel pump has left the building. Not even in the car and the fuel tank has been exposed to the elements. (the driver door has been open all this time)
  2. The fuel lines are cut in the engine bay
  3. The inlet snorkel is not around
  4. Battery terminal have take a beating (not sure why this would have been )
  5. The car has 3 steel wheels and 3 alloy wheels
  6. Battery is missing
  7. Drivers door panel hanging off the door (hence the door open all this time)
  8. small dent in the drivers door and a scrap mark on the drivers rear quarter panel.
It was all too hard
Slight damage to body
It was all too hard
Dust everywhere
It was all too hard
Not sure why there is a stick holding up the hood. Fuel line is a worry
Door open for some years
It was all too hard
The car as we found it. Bonnet/Hood up and drivers door open.


It was all too hard

Next job

Was to see if the engine will start so fitted a battery carried out the standard checks before we attempted to fire the engine. We sprayed “Start Ya Bastard”into the engine and it fired up straight away and sounded sweet for the short time it ran under test conditions.

We now know that the car had a fuel problem of some type but what specifically is still not known but highly suspect that the fuel pump failed.

Next job was to find a donor car so we visited the local wreckers where we found the same model car that had the same parts we needed to get our project car going.

It was all too hard
wrecked donor car
  1. Fuel sender unit with pump
  2. Air tract snorkel
  3. genuine tool kit
  4. Good battery terminals and leads

Now all the elements are sourced we can determine whether the project is viable which we think it is, but not by a lot.

Our plan is to get the car mobile in situation on the farm then drive it to get it registration checks.

We may even go as far as to carry out the NDG renovation treatment on the car on the farm.

Lets get going on this.

We will update this Blog as it happens.

Update 12th March

We removed the donor fuel pump and connector and headed out to the farm where the car was located. Installed the pump, sorted out the bad wiring, installed the battery and tested for power which there wasn’t any. Found the fuel pump fuse which was unmarked and the car fired up first go.

Reversed the car out of the shed and gave it a quick pressure wash and pumped up the tyres and took it for a short drive.

All the drivers door hardware was on the floor of the car but all the bolts and screws were missing so we taped the door closed and fitted the unregistered car permit to the windscreen and drove to town for the next phase.

Something got the better of us. The car was terrible to drive and a fuel line sprung a leak so fuel was spray in the car interior. A quick fix and then an idea occurred to us. Take this car straight to the wrecking yard!

We didn’t make it to the wrecking yard. The car stopped on the side of a lonely country road, refusing to go any further.  Not giving in we sent back our pilot car to get our SUV and a tow rope to complete the final few kms to the wreckers, which we did and got there just before closing time.

It was all too hard
Final resting place 306

Our wrecker friend would not let us abandon the car but instead offered his workshop and a special deal on the donor car in his yard to get the job completed. He is a big supporter of our Blogging work and he said that this is all part of the story and to go away and think about it overnight.

We left the car in his yard to go away and think about it.


Copyright ©2018 Nano DG Singapore Pte. Ltd. All Rights Reserved


This function has been disabled for NDG PRODUCTS.