Ex-Rental Motorhome makeover

Many rental motorhomes make it to private owners once they have been sold off by the rental companies.

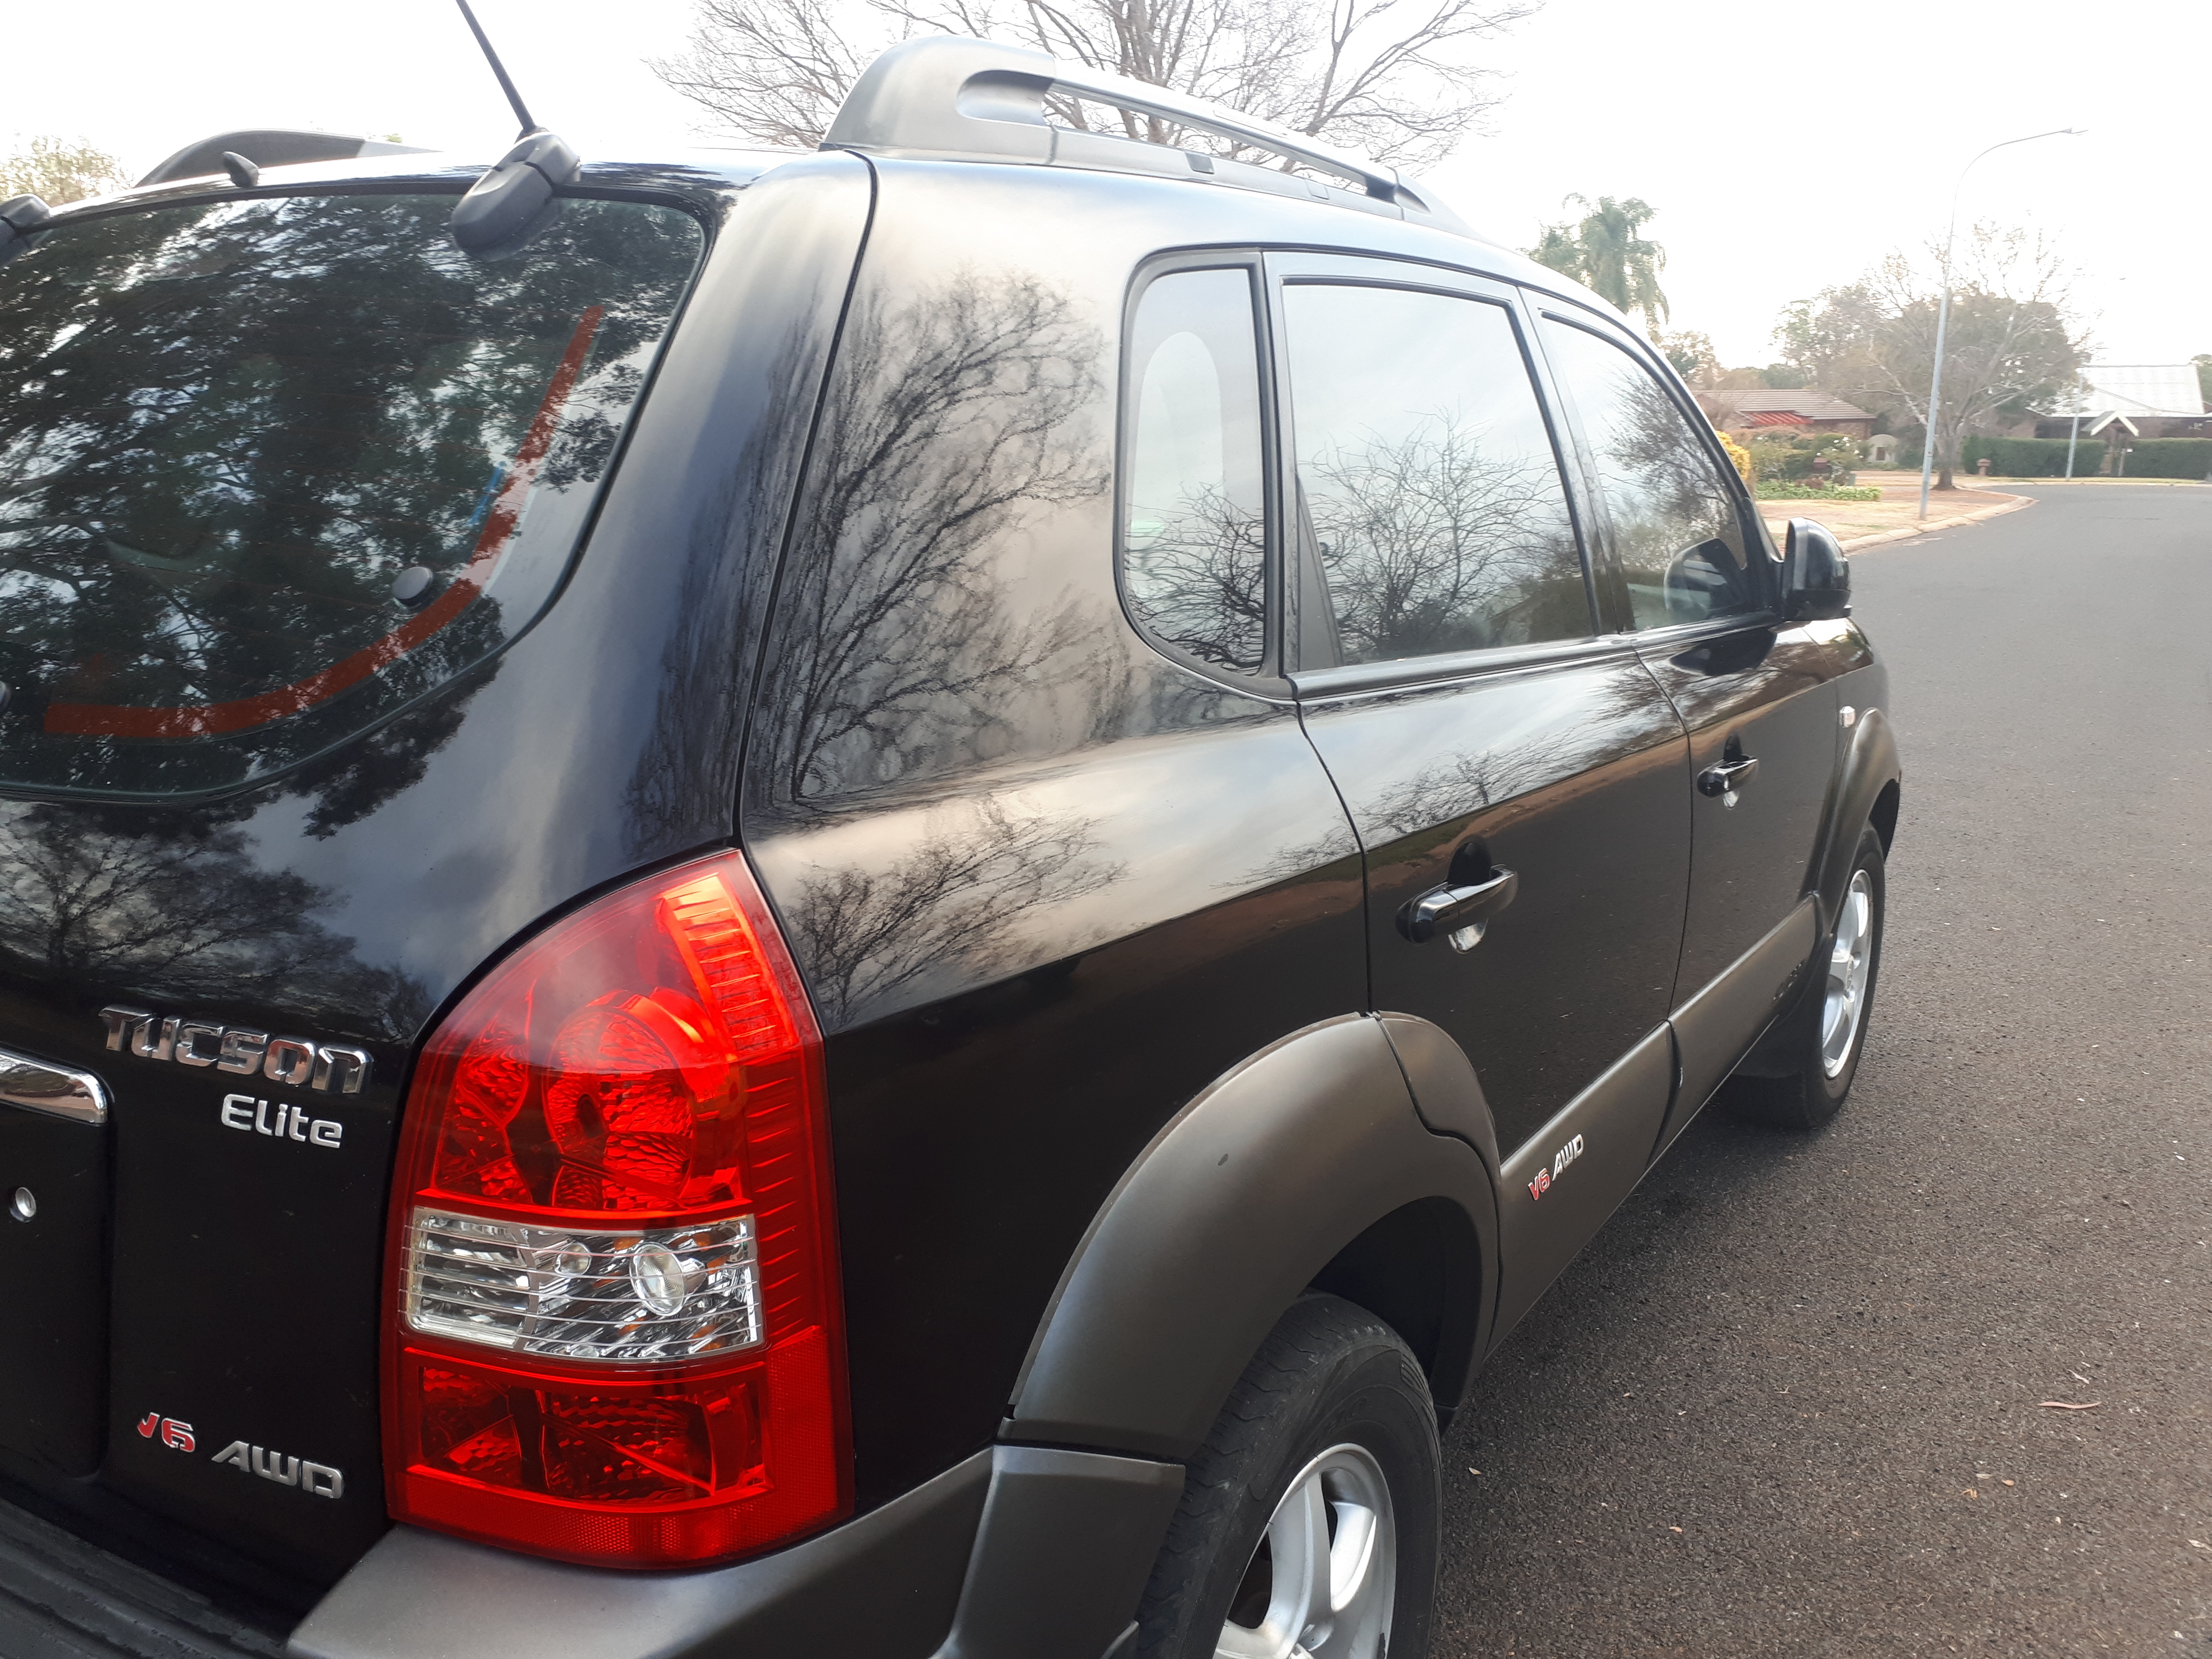
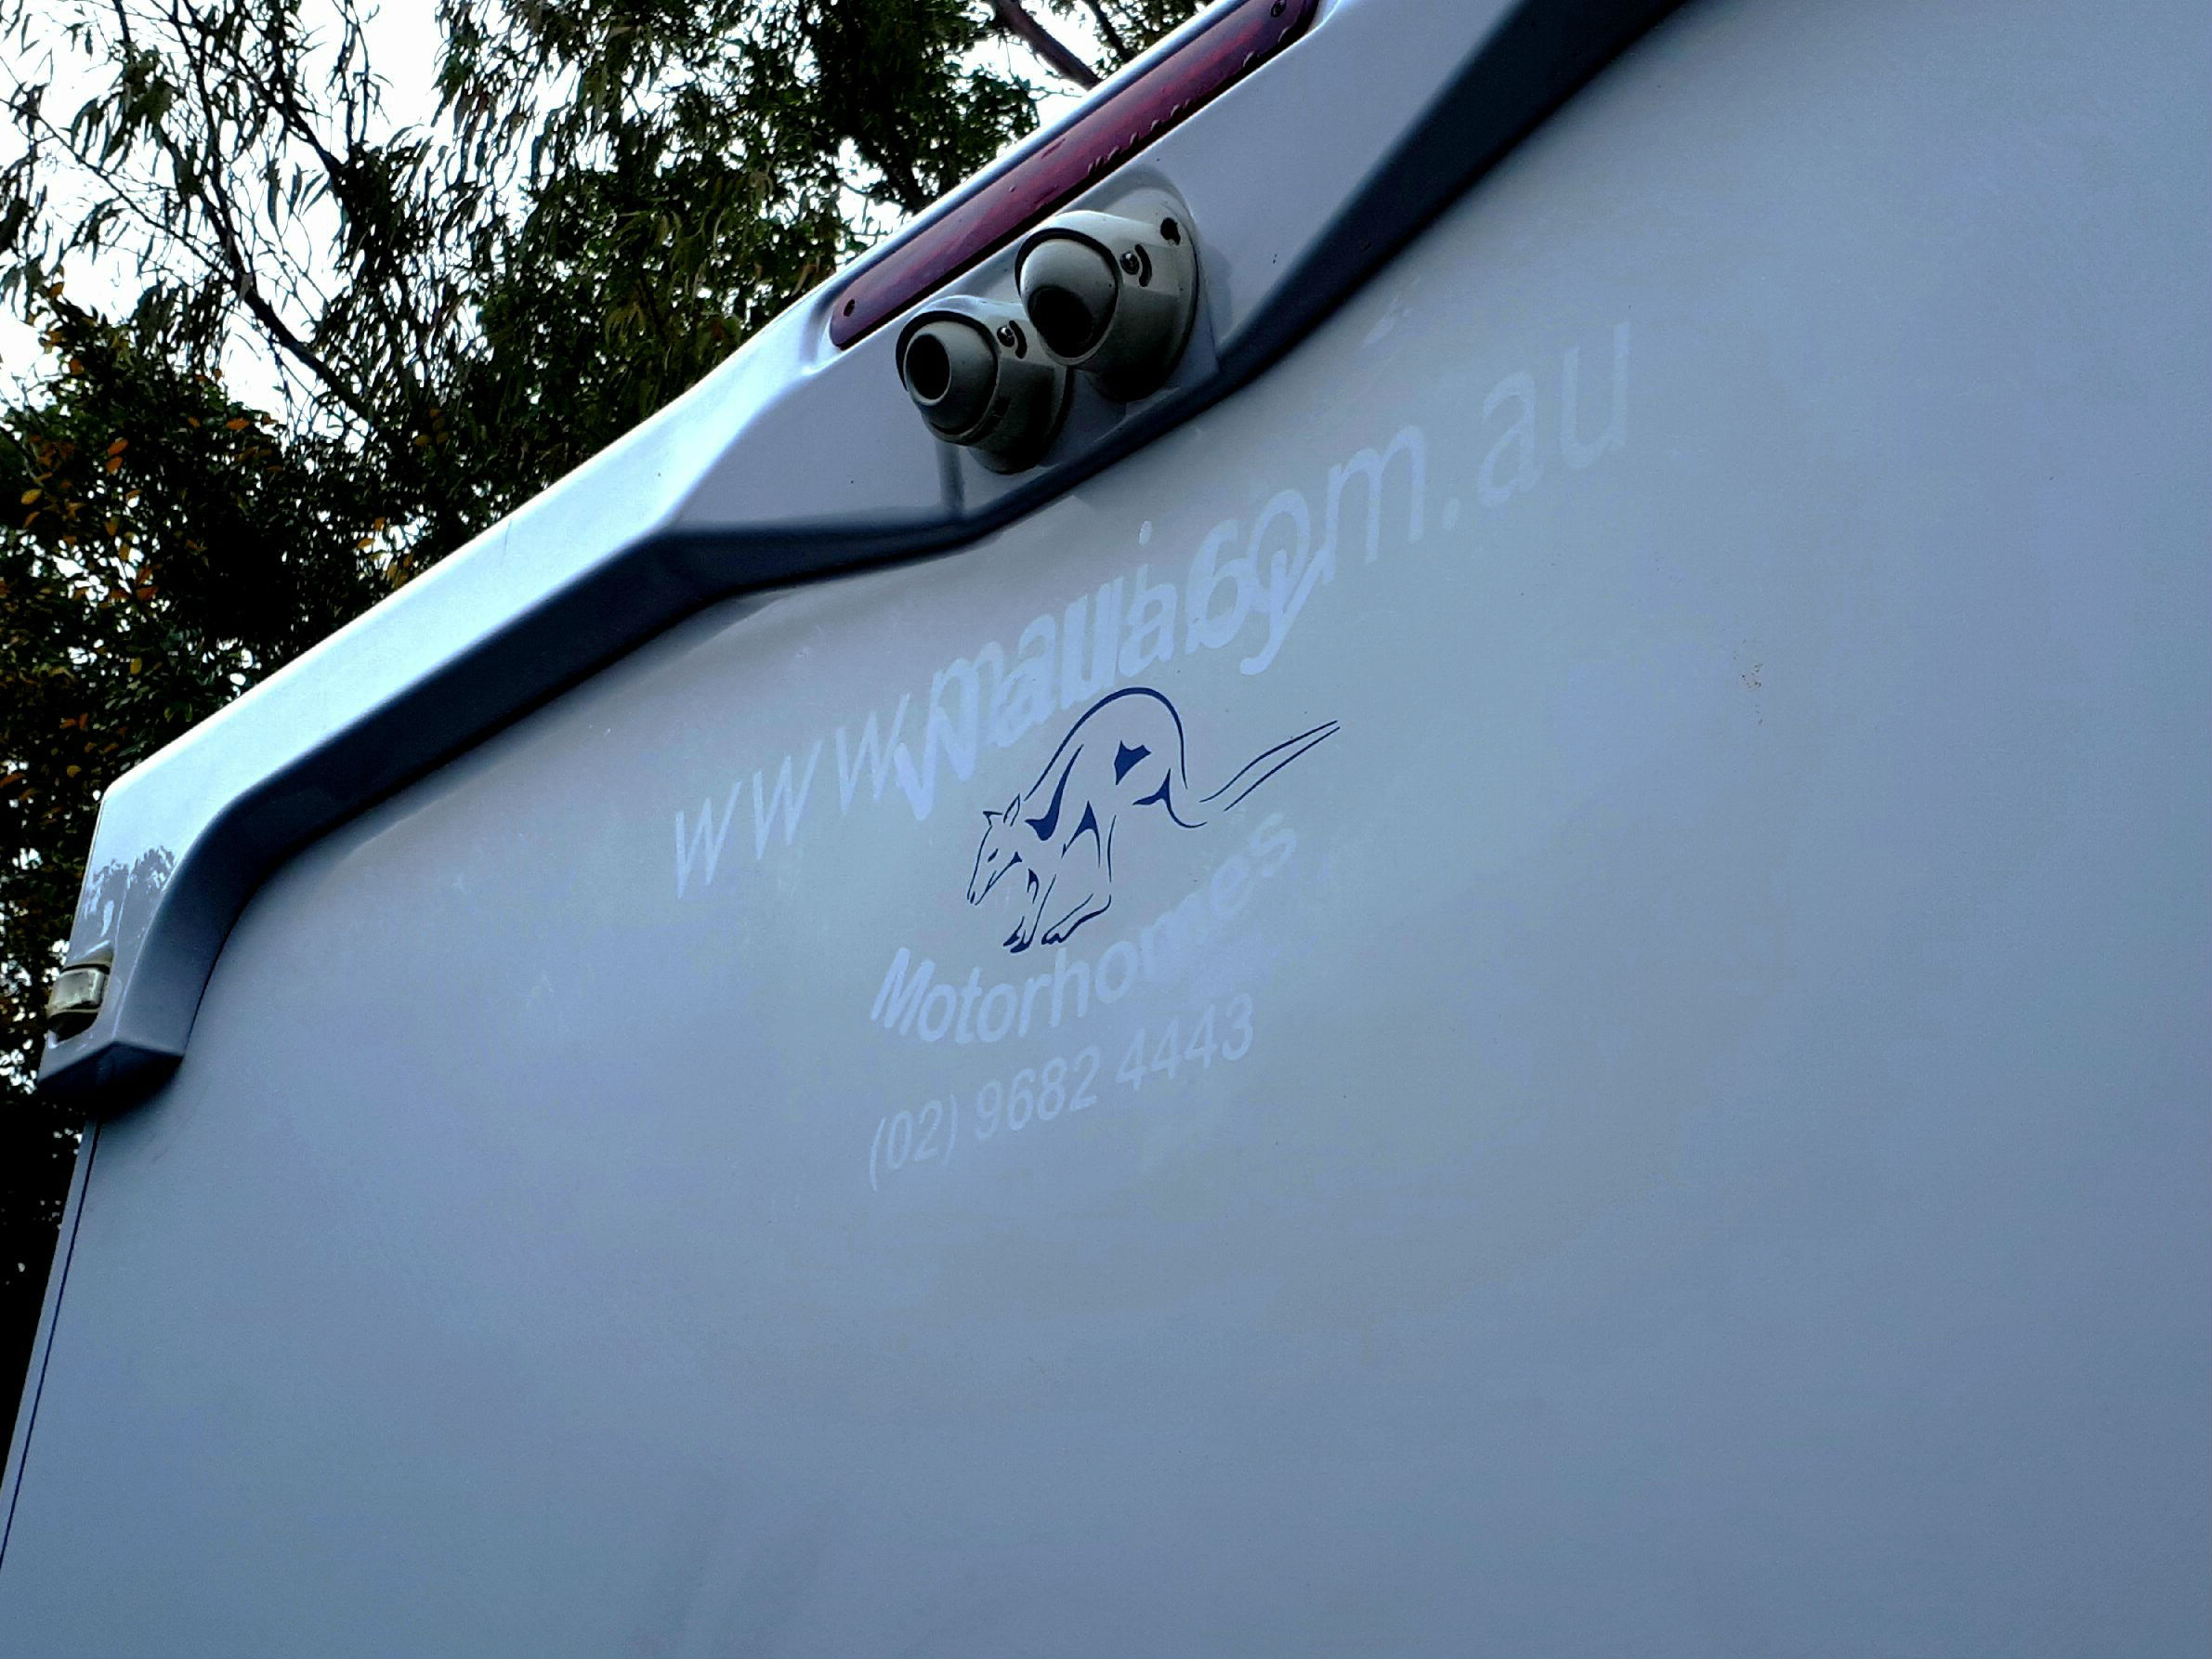
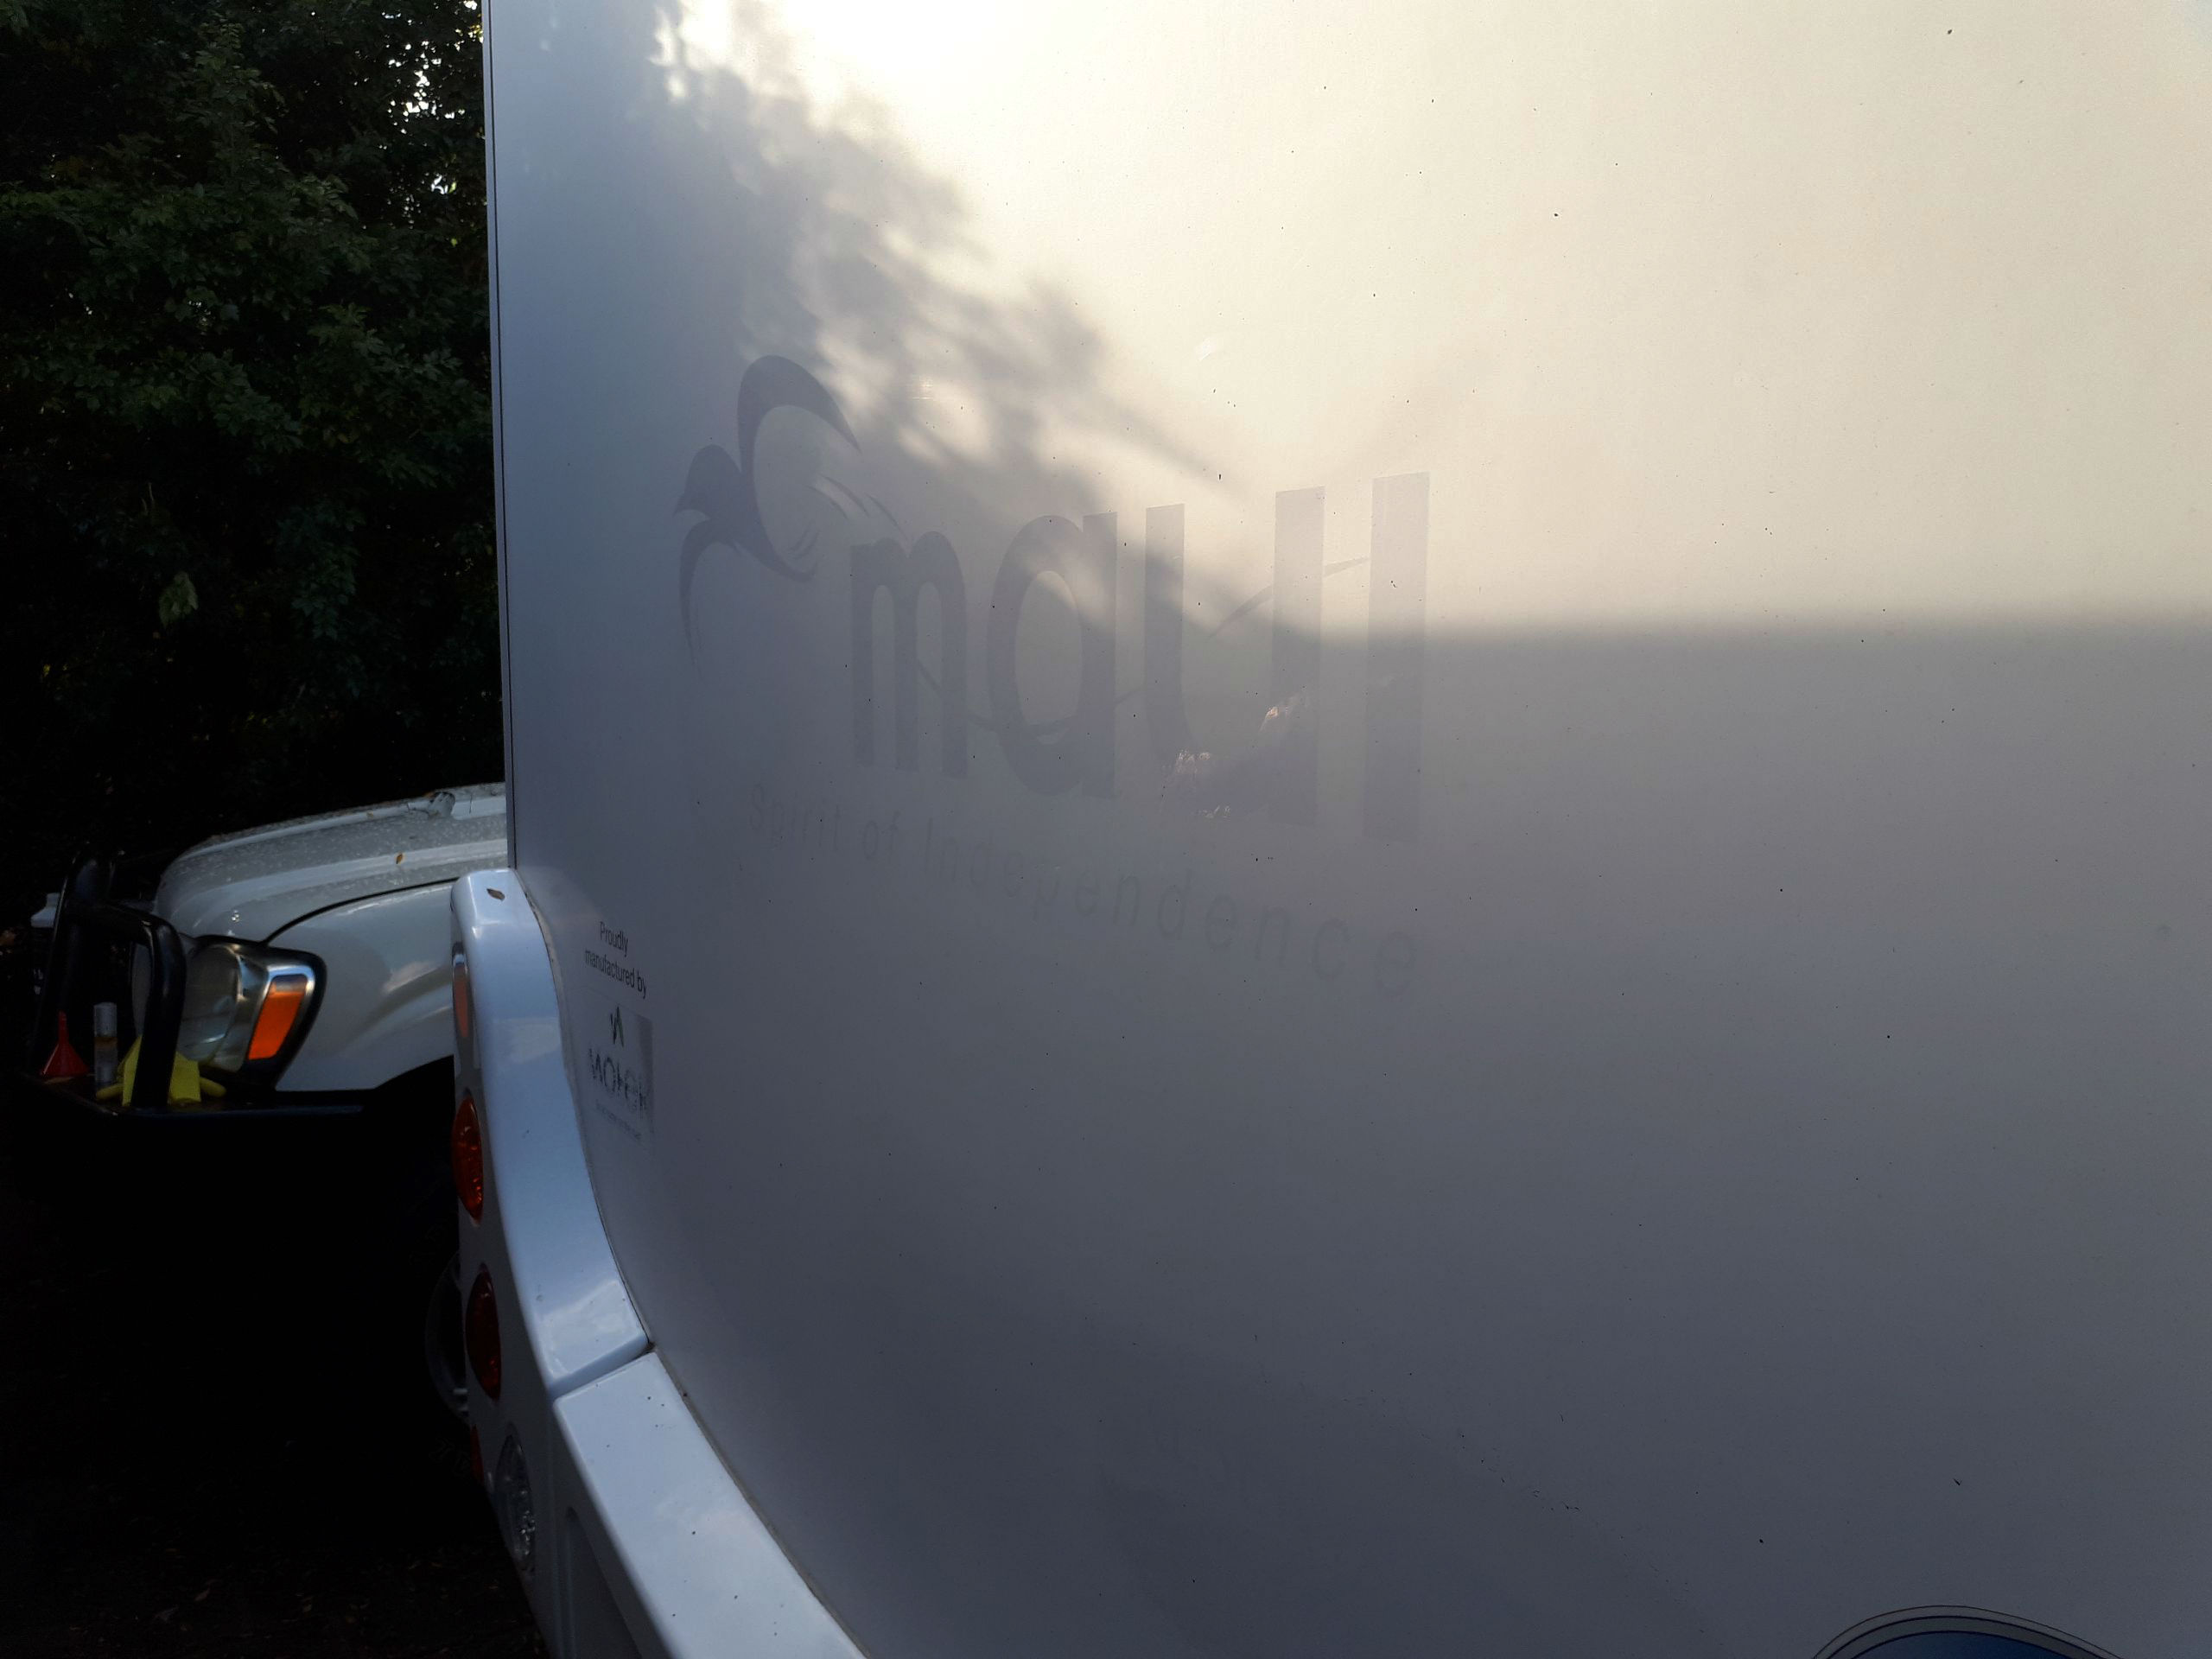
These ex-rental units make great value buys for their new owners and one of the reasons they are sold off cheap is that even though they have had their corporate branding removed it is still clearly visible.  The oxidisation of the body paintwork makes this branding indelible and close to impossible to get rid of.

The owner of this campervan had heard of our successes with restoration of very bad paintwork. This to us is great as word of mouth references are the best for of reference.

So what did this owner want?

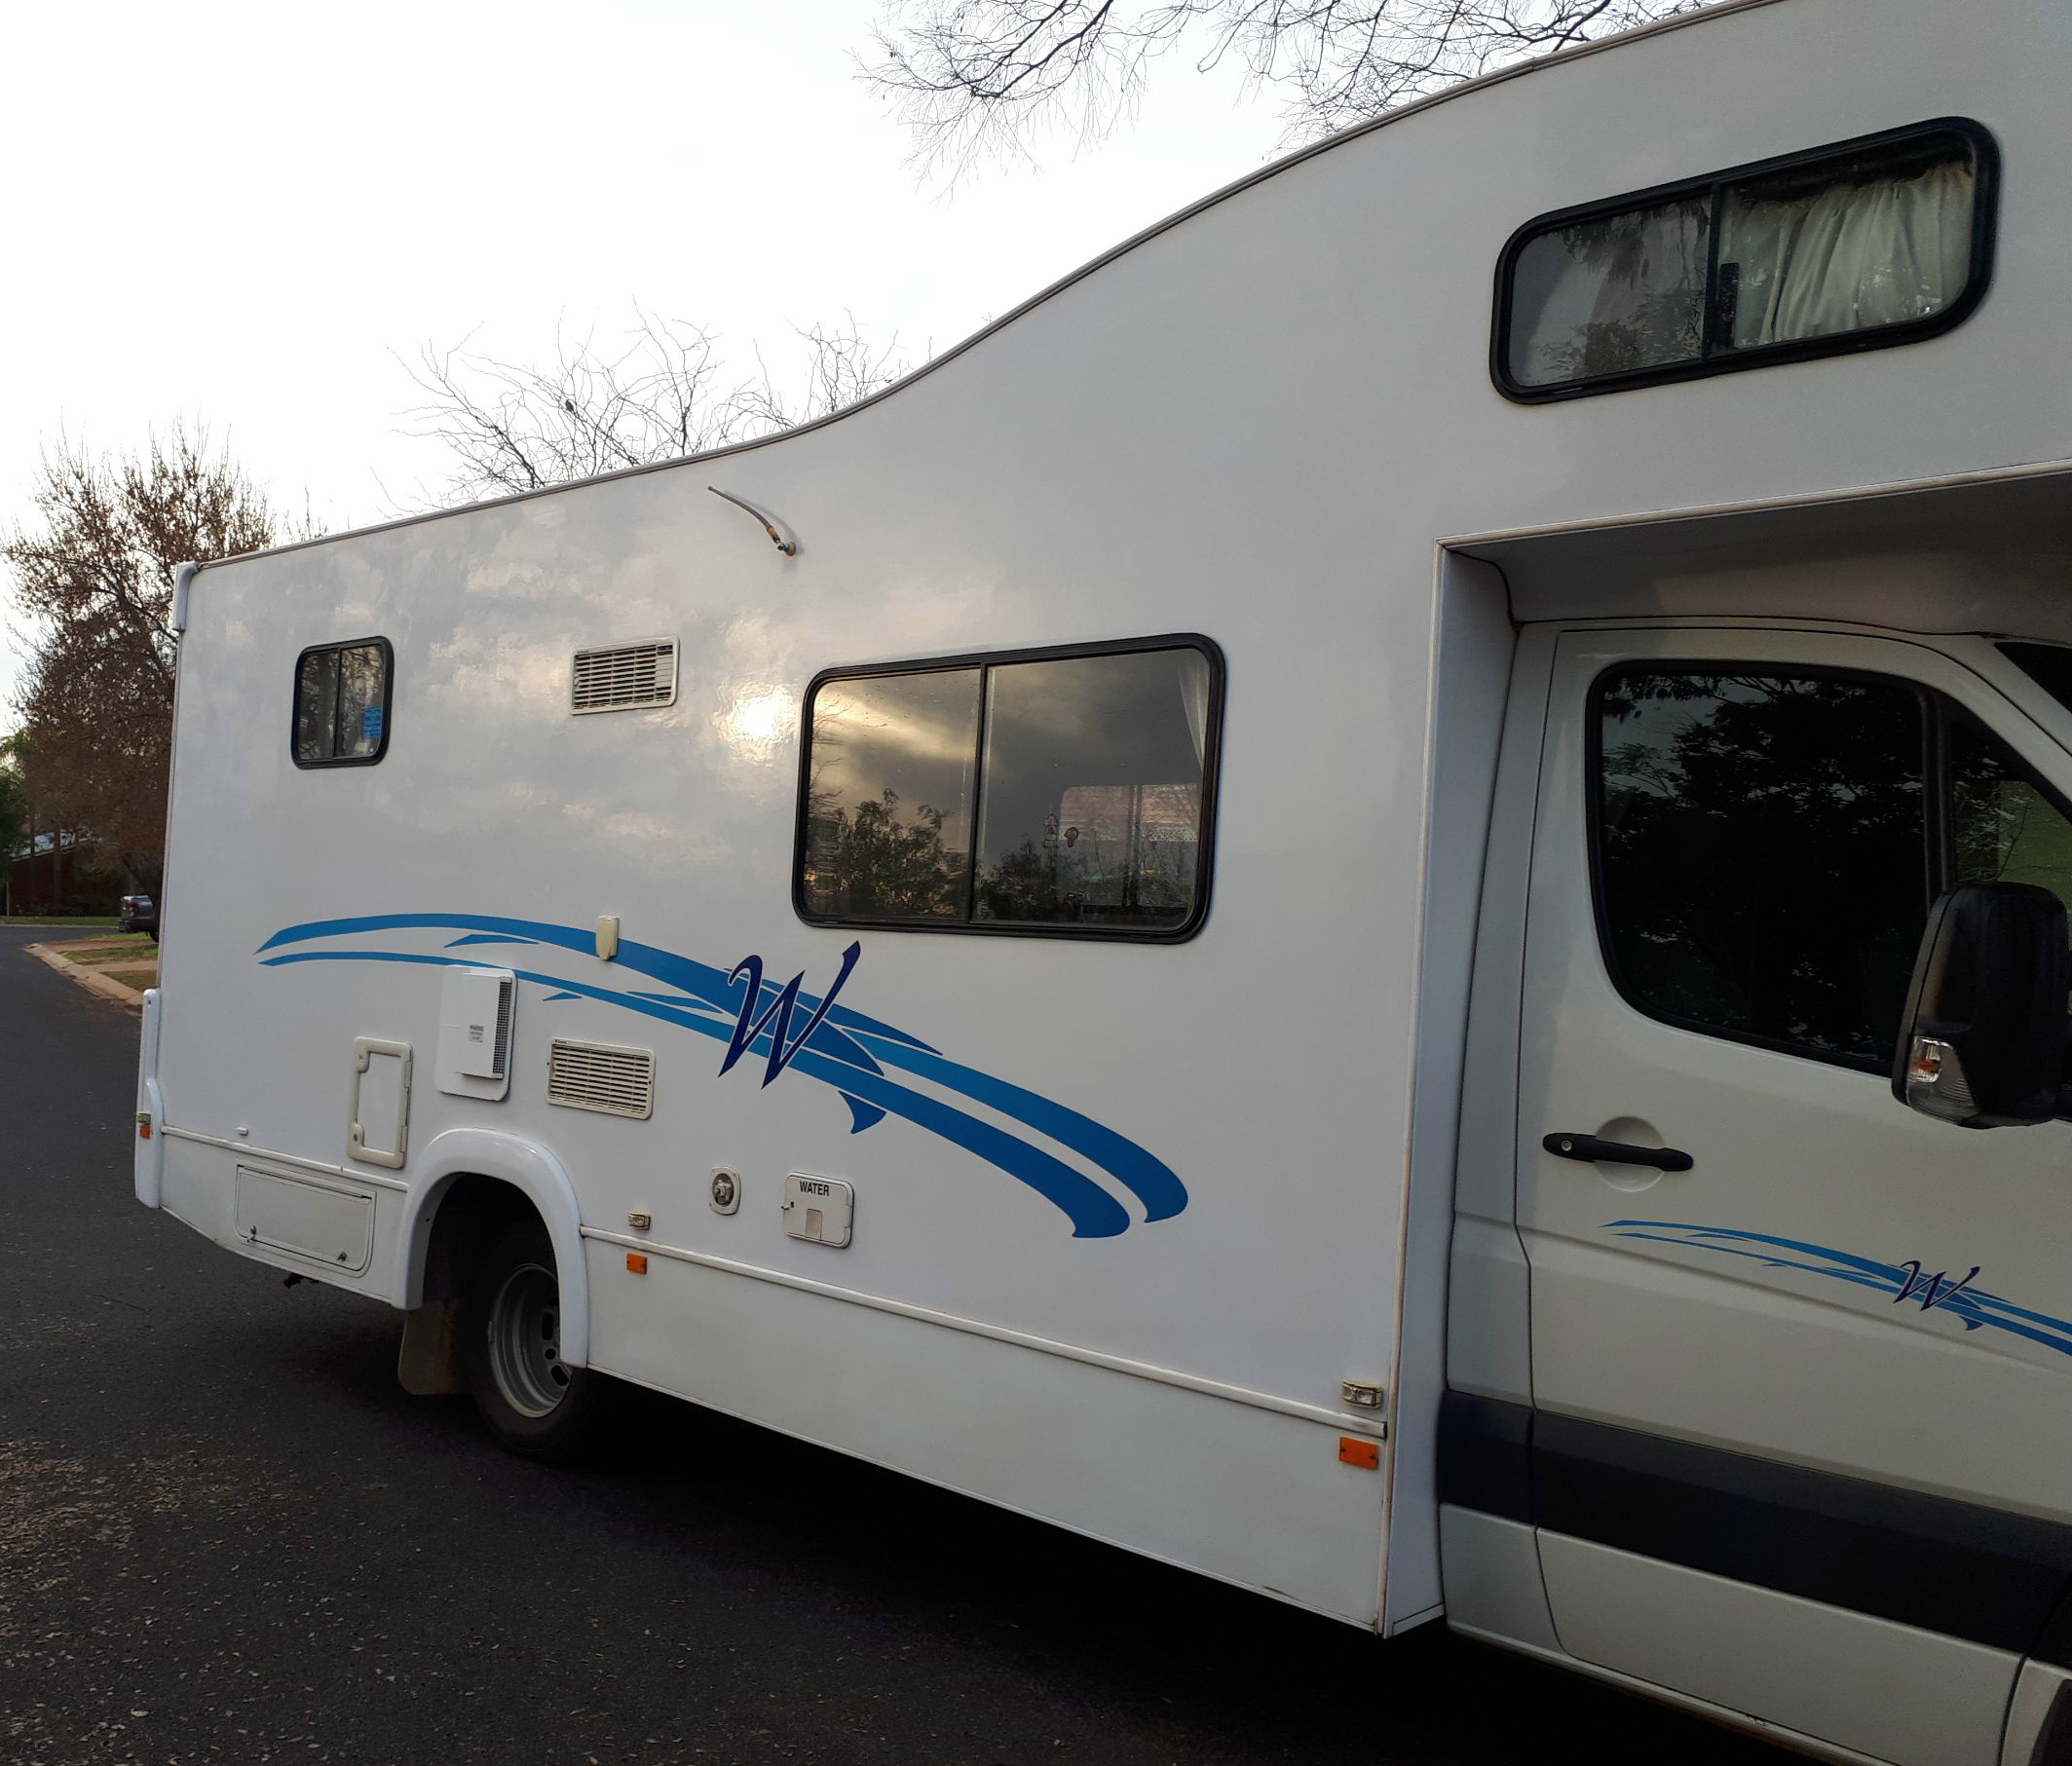
He ad owned it for several years and he wanted all the shadow branding removed from all sides of the van as he looks at it ever time he looks at the van and on top of that people comment everwhere he goes and that really annoyed him.

Ex-Rental Motorhome makeover
Overlap of new and old lettering and Branding


Badly deteriorated decals have to go.
Very obvious shaddow branding in big letters
Ex-Rental Motorhome makeover
Opposing direction of stripes makes for a serious challenge


OK, we get to work

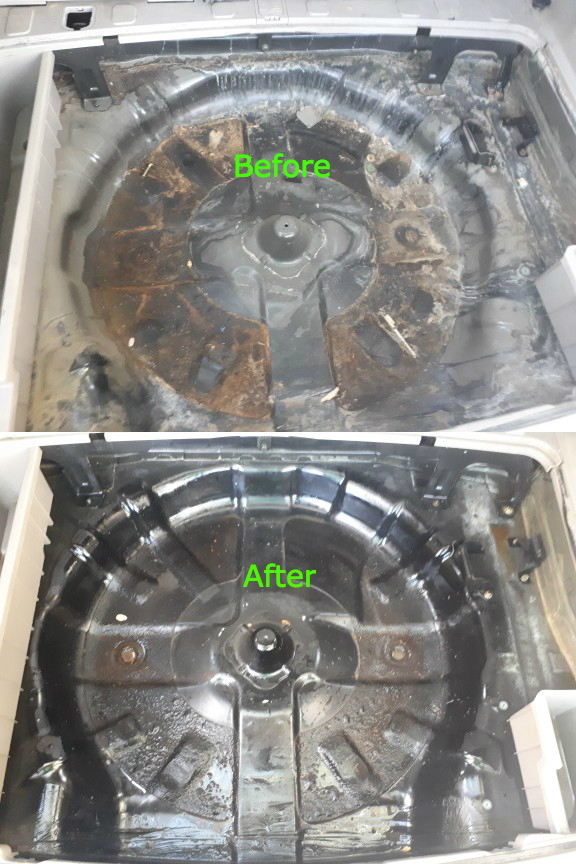
  1. We carefully remove the non essential lettering from the body
  2. claybar and wash the body with NDG Mega Gloss wash and NDG Aggressive claybar
  3. We then bring out the big guns and rotary cut the body with NDG Nano Diamond compound
  4. Mega Gloss wash the residue off the surface
  5. Wet the surfaces and applied NDG Hyperseal
  6. After 60 minutes we rotary buff the body on medium speed using a waffle pad

The challenges we faced

  1. were that the stripes on the side were running the opposite direction to the original branding stripes and intersected in several places this took extra skills to get this right without damaging the new stripes
  2. Very difficult to navigate around all the compartment doors, windows and conduit where most of the oxidisation had occurred.
  3. Owners arrived to find the results far better than they expected
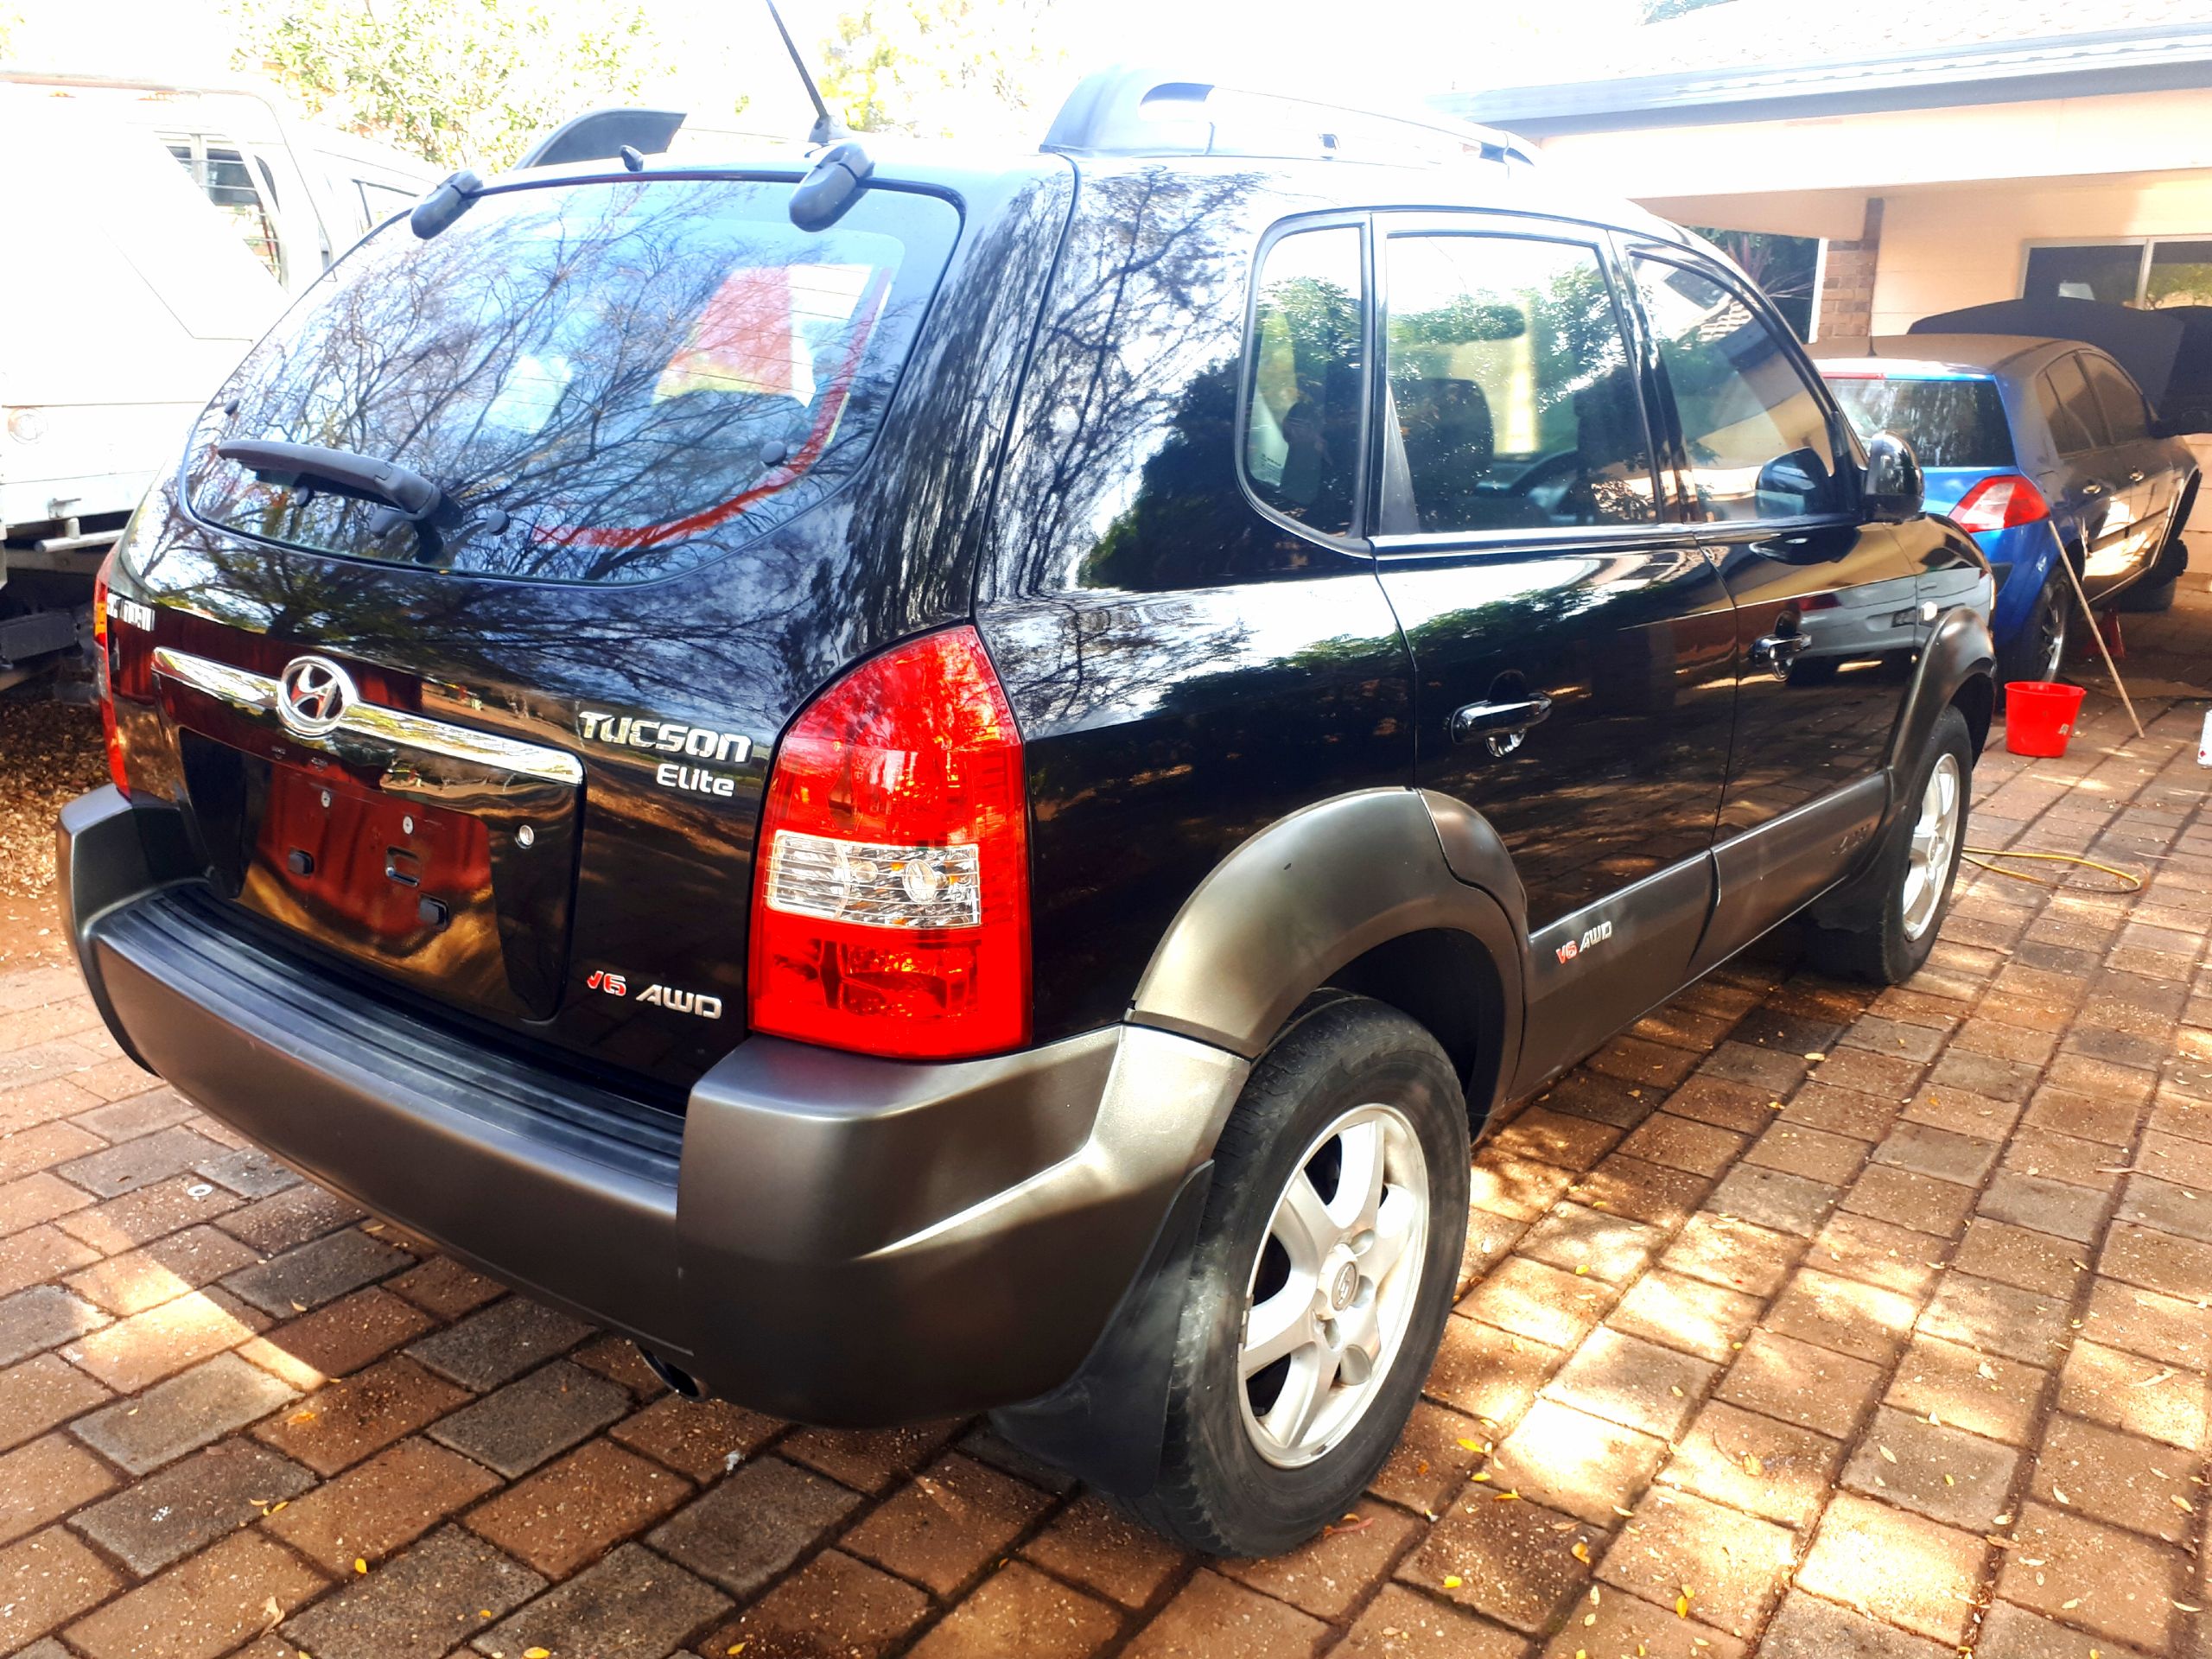
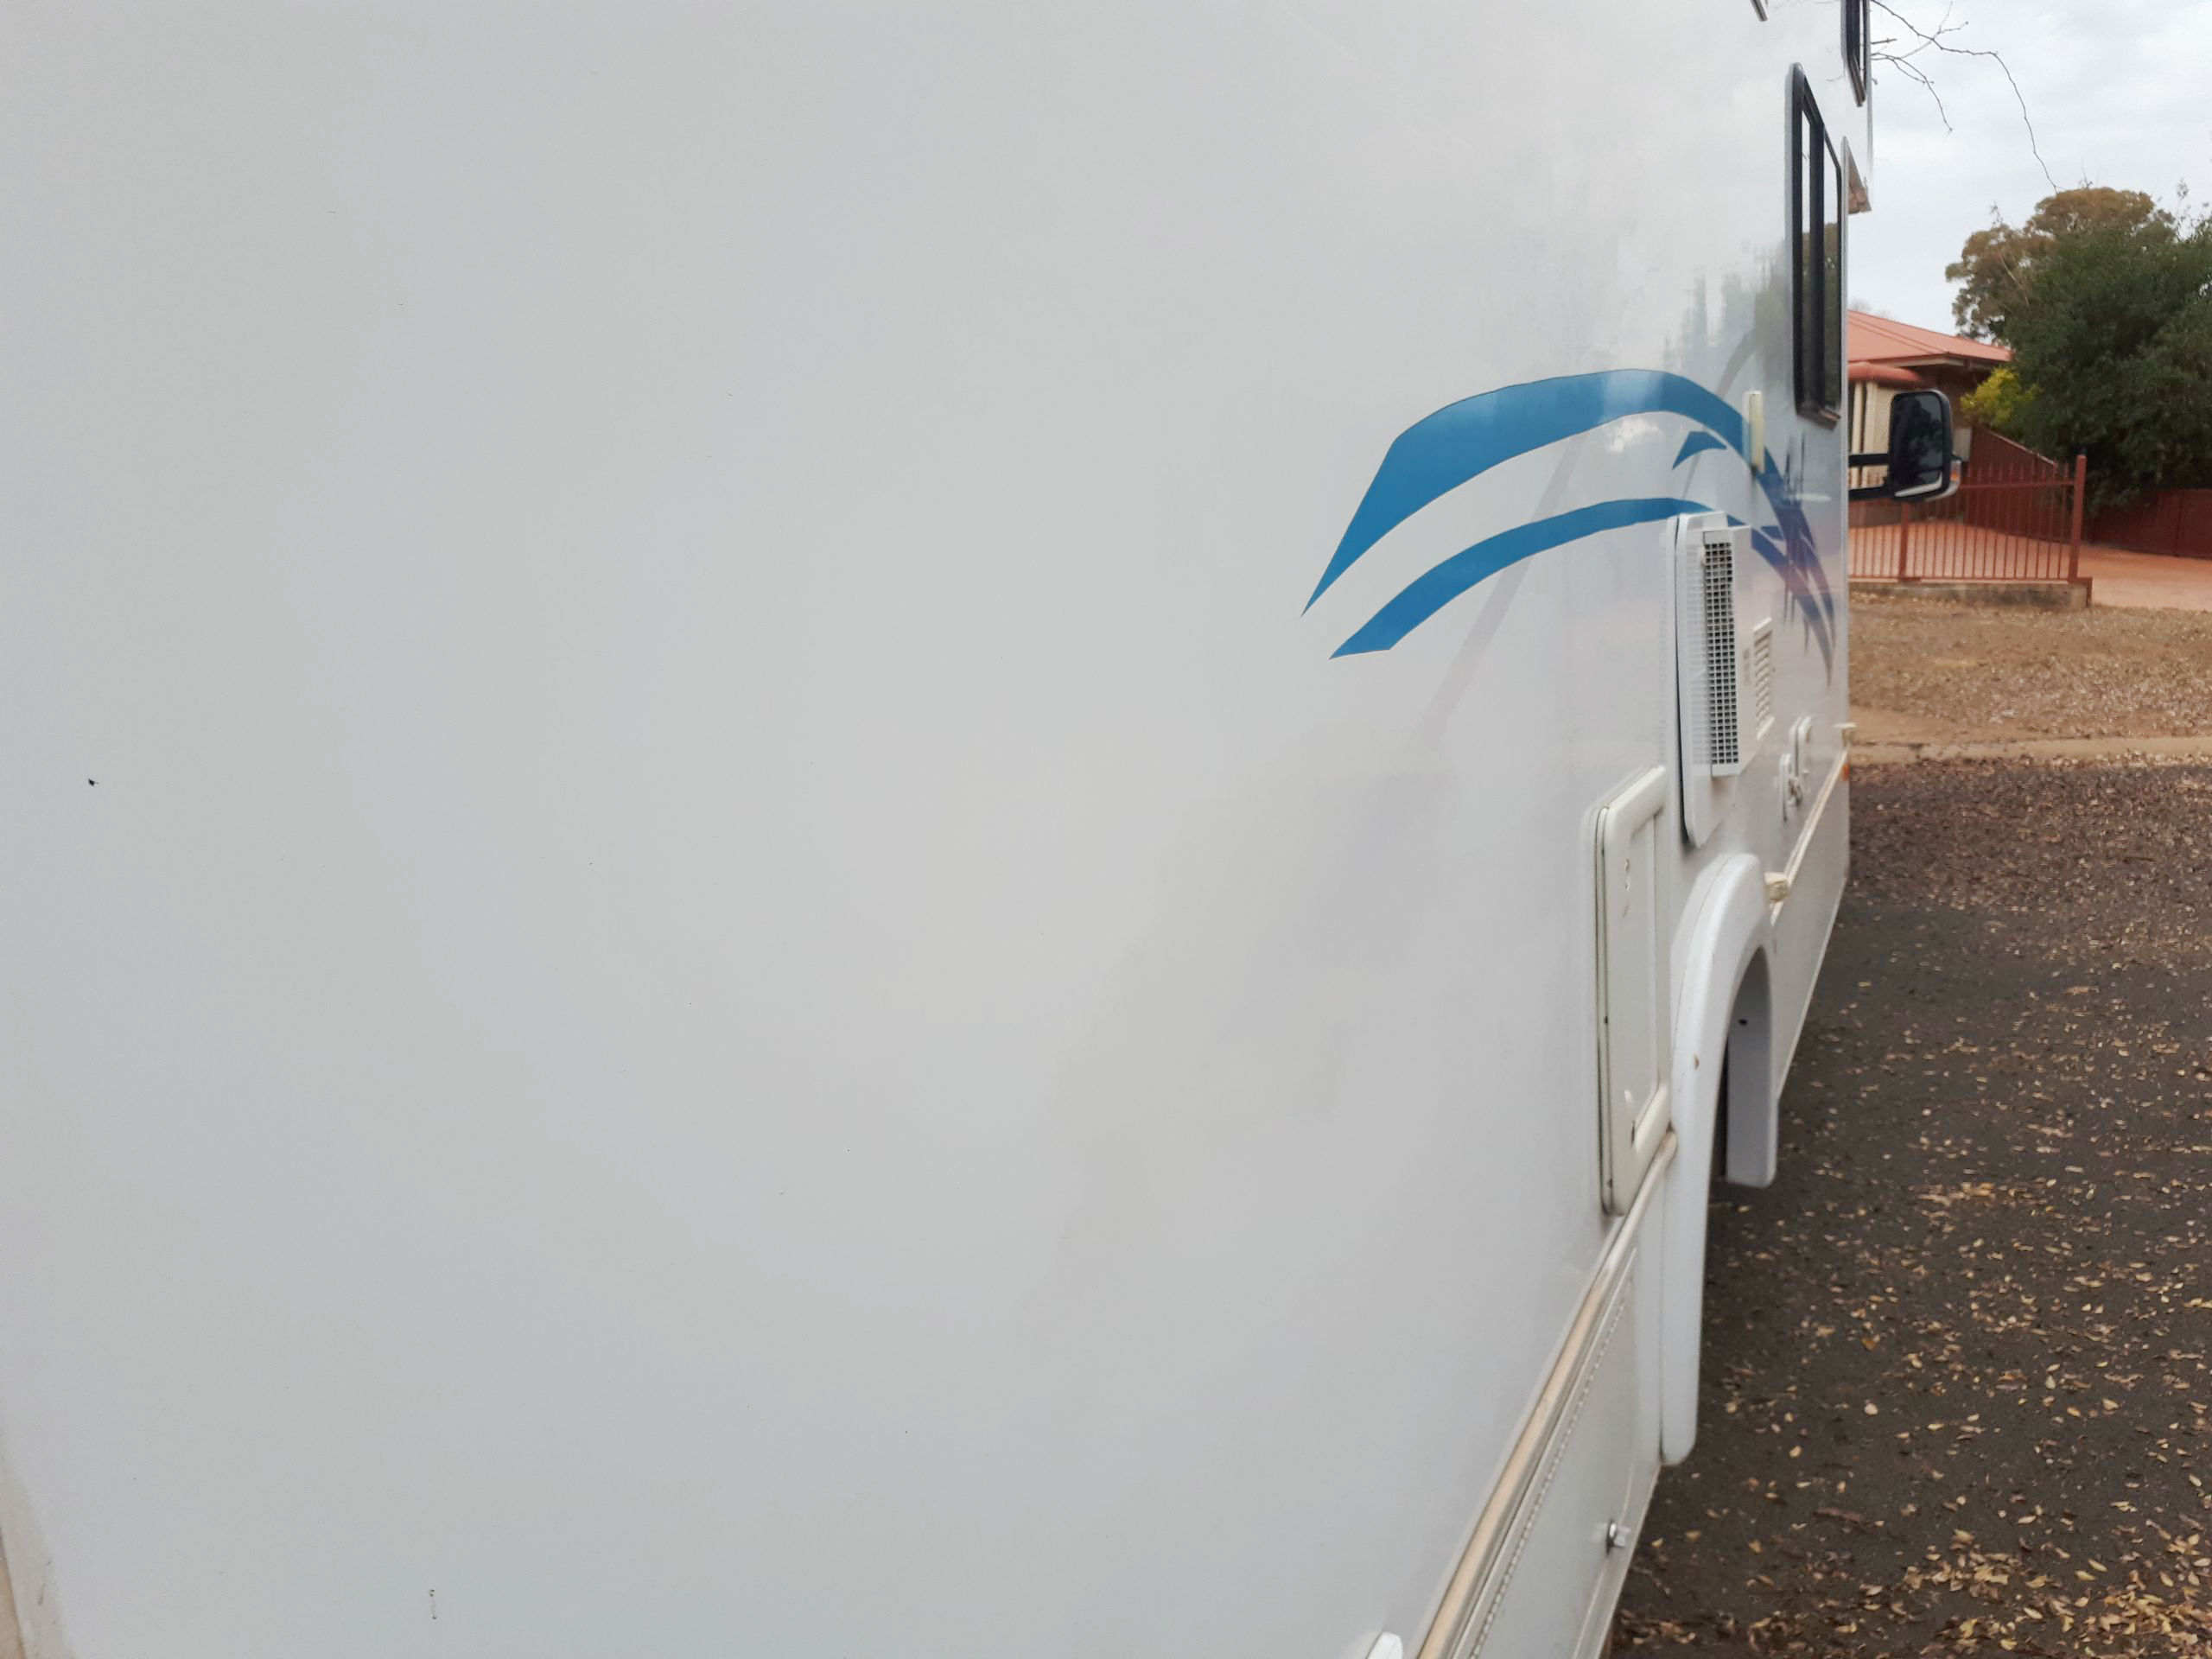
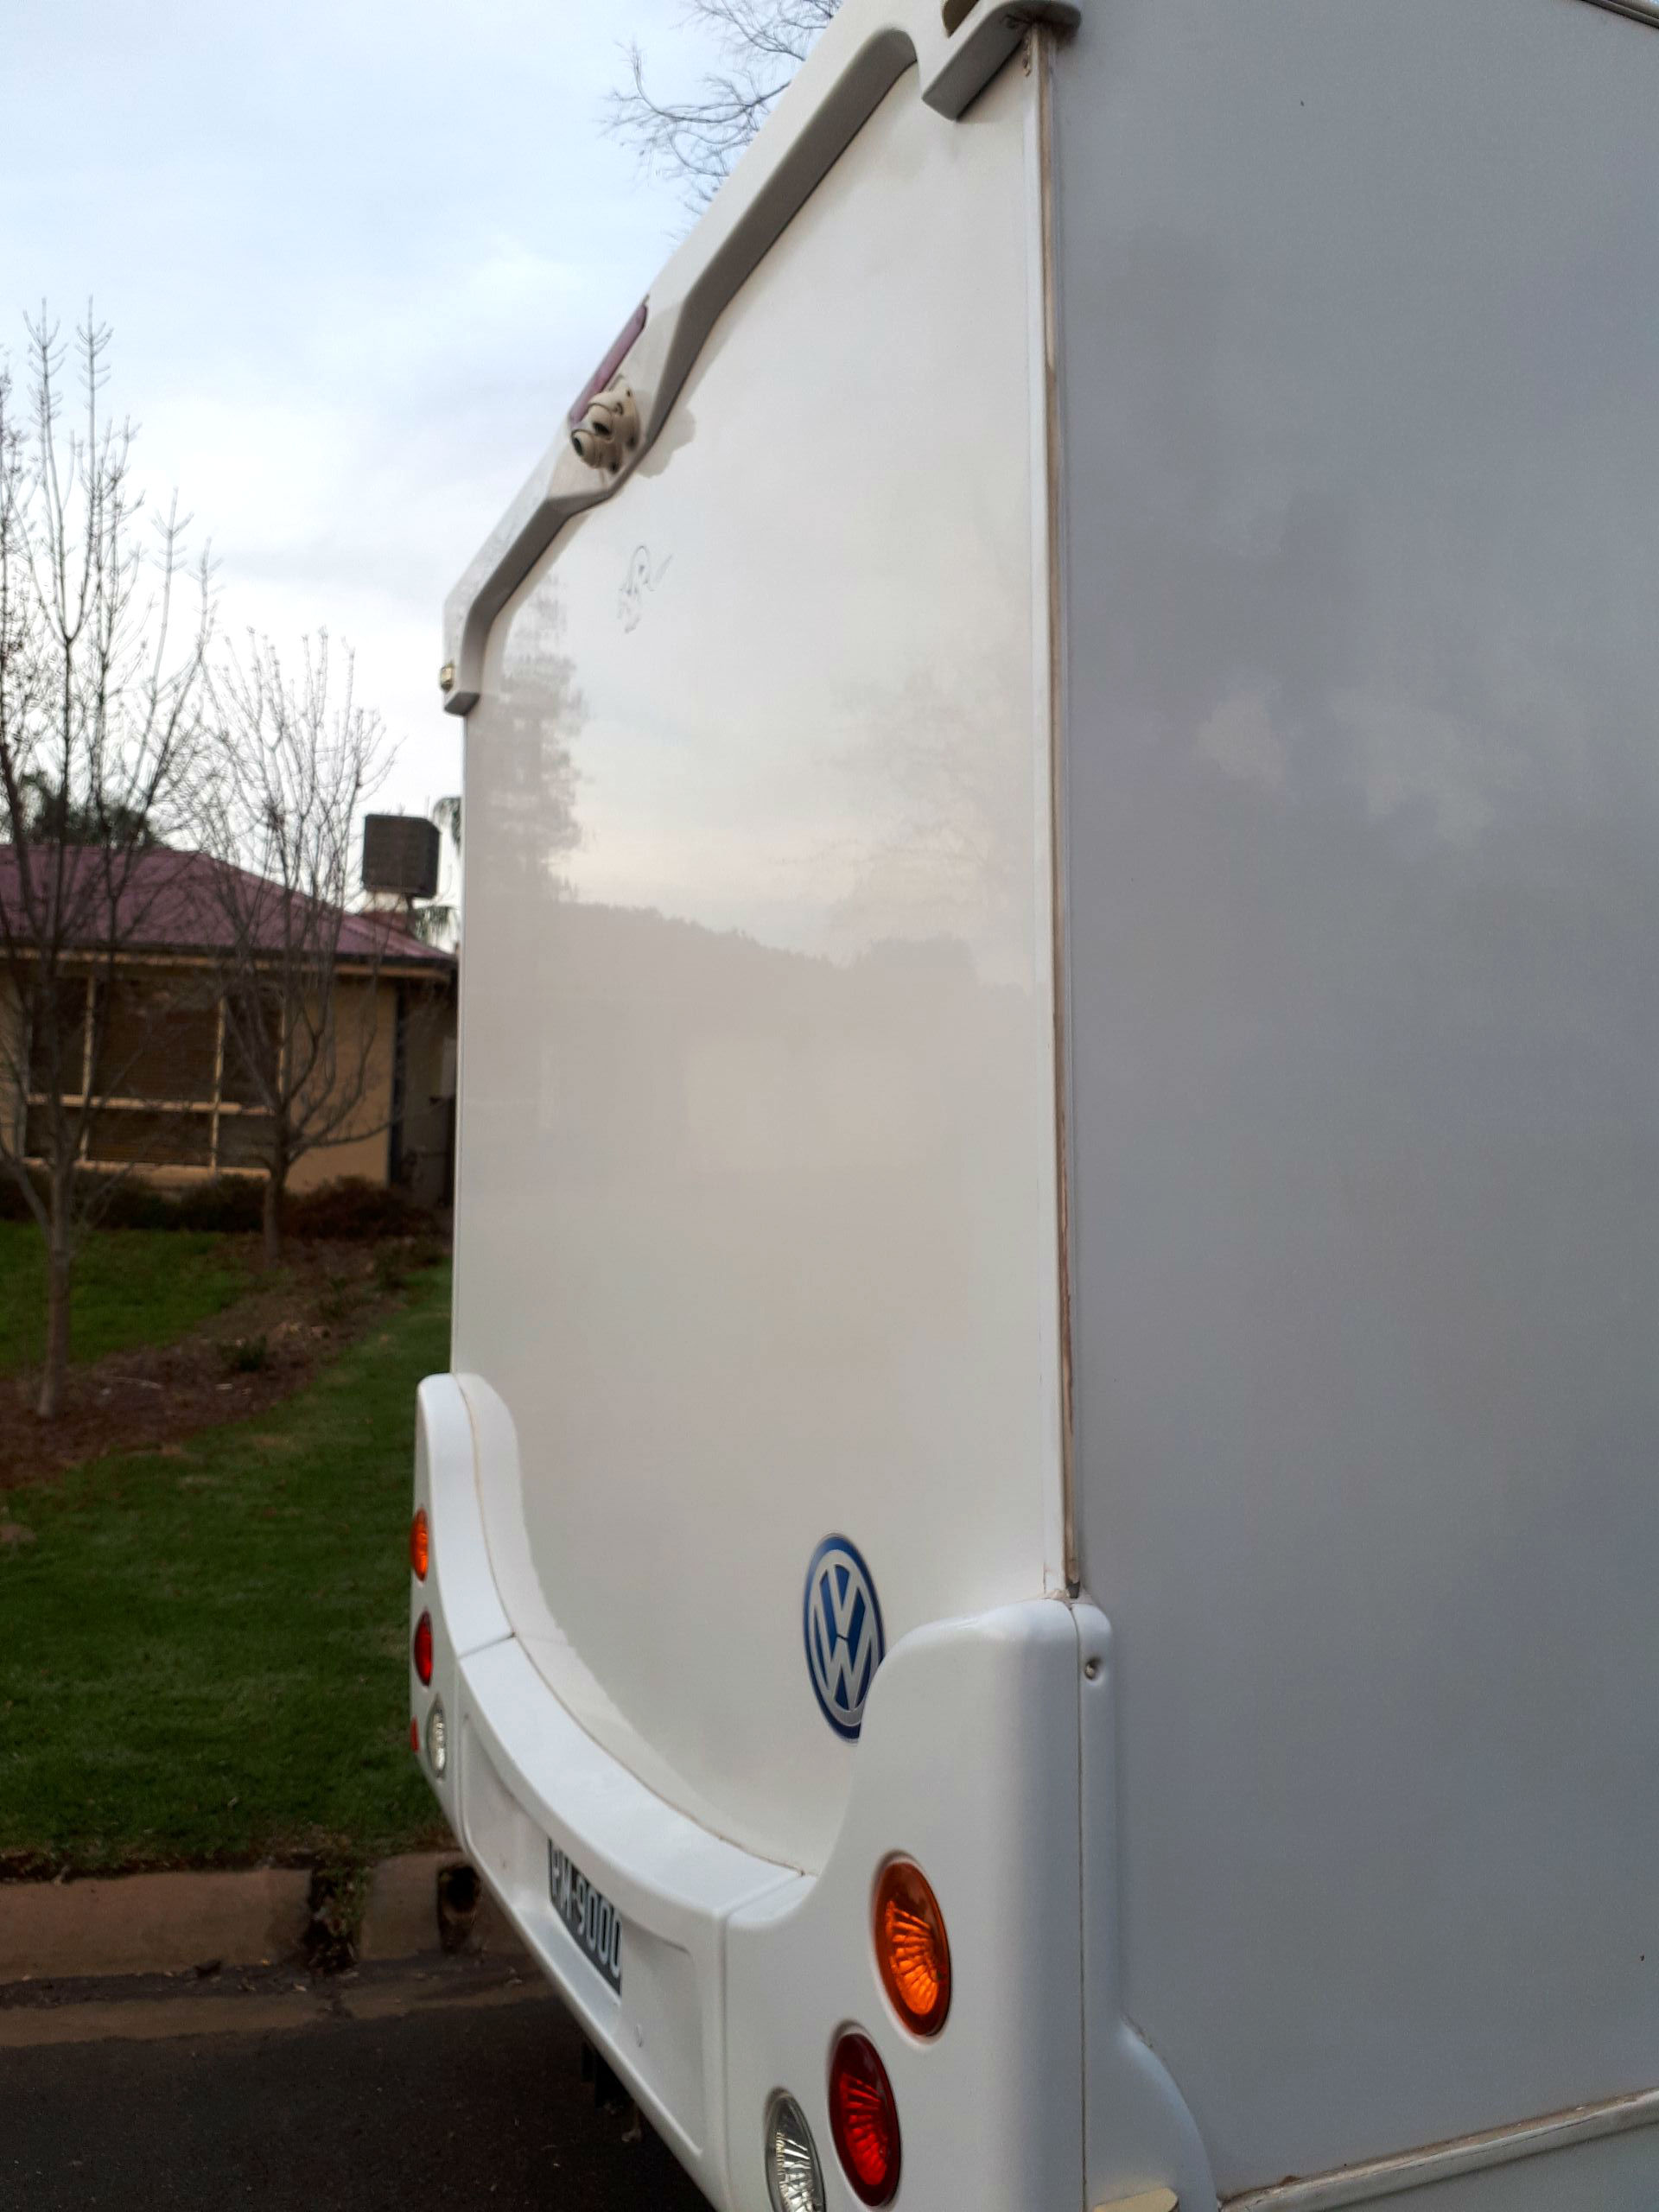
The end result

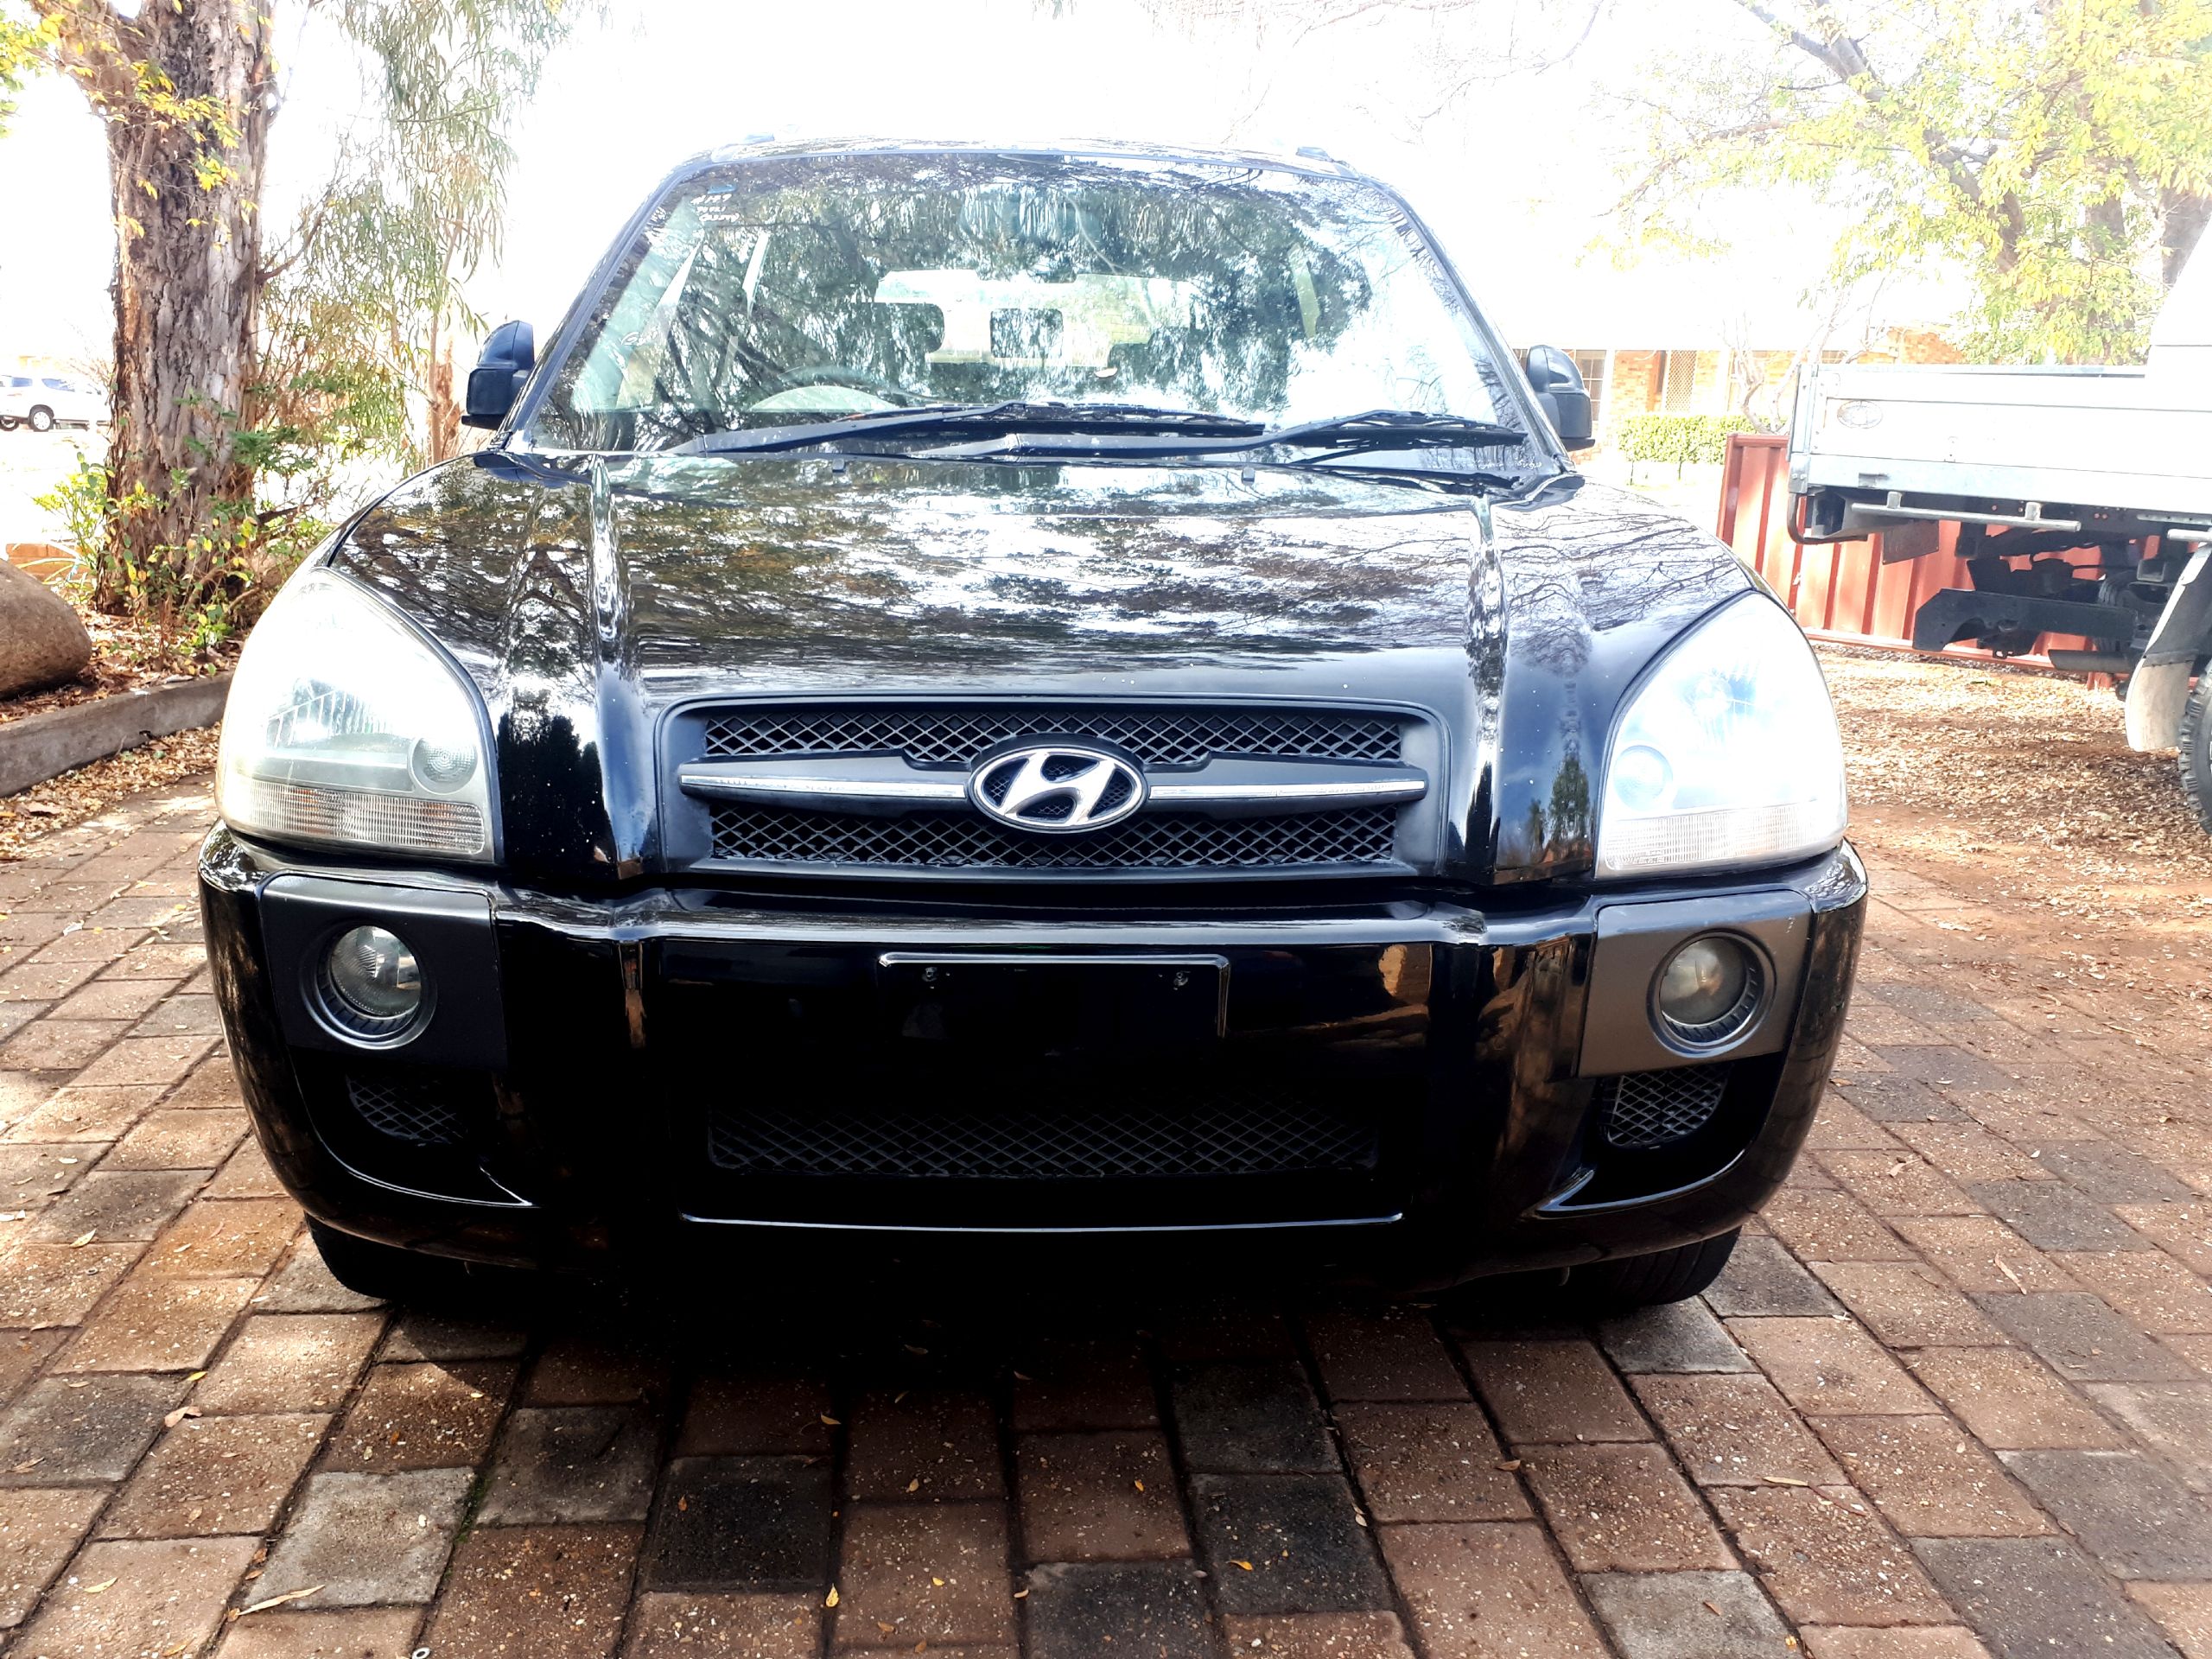
The campervan was restored to it’s off the showroom condition which is something we wanted to achieve.

The owner said, “Sensational result. It will put my mind at rest not to turn and look at the van hoping not to see the shaddow branding. THANK YOU!

Ex-Rental Motorhome makeover
That Showroom Gloss

Ex-Rental Motorhome makeover

End


Hyundai Tucson makes a solid come back

Hyundai Tucson makes a solid come back

Hyundai Tucson makes a solid come back

There is always a danger of buying cars on auction as you really don’t get a sense of what the car has been through in it’s life and, in this case the heading “Hyundai Tucson makes a solid come back” is an understatement as this car has been beaten on. A 2005 model city car which somehow ended up at the car auctions and then to us to see what we could do with it.

We will do all this work using DIY techniques and NDG Products. There will be a significant amount of mechanical work to do carried out and to keep the cost realistic as will look for a low millage donor car to source the parts. But our mission is to get this car looking and smelling as close to showroom condition as possible. We have given ourselves a week to complete this project. Is it even possible?

At first look we see

  1. That it was a smokers car so heavy smoking smell and it has been beaten on for some years, very run down with layers and layers of problems
  2. Light beige interior with significant black marks all over the seats and nicotine smells and discolouration from smoking
  3. Cracked centre armrest and heavily soiled
  4. Steering wheel airbag damaged and worn trim
  5. Driver’s seat torn
  6. Worn gear leaver trim
  7. Fuse panel exposed (not a good sign)
  8. Lettering missing off rear hatch door
  9. ABS light on
  10. Radiator leaking and coolant all over the ABS pump and underside of the car (has been leaking for some time)
  11. Valve lifters ticking
  12. Idler pulley noisy causing drive belt system squeal
  13. Power steering pump reservoir hoses swollen and rubbing on serpentine belt
  14. Belt tensioner noisy
  15. Engine bay layered in typical city driving soiling
  16. Paintwork dull and covered in light scratches
  17. Headlights crazed and have been restored some time in the distant past
  18. Rubbish quality window tint causing poor vision clarity
  19. Some sort of oxidisation in spare wheel well ( needs more investigating)
  20. Auto transmission fluid brownish colour
  21. Tyres worn and spare tyre bald
  22. Car drives straight and no wheel bearing or unusual driveline noises and surprisingly no evidence of accident damage or repairs
Hyundai Tucson makes a solid come back
Headlights need a good NDG restoration
Hyundai Tucson makes a solid come back
Very dirty interior, black hand prints everywhere. Bio Crystal Magic for them
Hyundai Tucson makes a solid come back
Badly stained seat trim

Hyundai Tucson makes a solid come back
Engine bay has typical city driving buildup and some horrible noises coming from the drive belt side.


Hyundai Tucson makes a solid come back
Paintwork is very dull and covered in swirl marks from automatic carwashes
Hyundai Tucson makes a solid come back
Something must have spilt into the wheel well and is growing crystals

Plan of attack

  1. Find a donor car
  2. Diagnose ABS fault
  3. Find source of coolant leak
  4. Clean engine bay and solve engine ticking and belt system squeal
  5. Change engine and transmission fluids and filters
  6. Claybar body to see how much paint correction is required
  7. Cut and polish body
  8. NDG Hyperseal treatment
  9. Clean and restore the interior neutralising the smokers smell
  10. Restore the headlights

Work process

  1. Donor car found (in local wrecking yard)
  2. Removed parts from donor car. Radiator, thermostate, ABS pump, serpentine belt, idler pulley, belt tensioner, abs switch, drivers seat, steering wheel and airbag, luggage security panel, spare wheel, rear hatch lettering, center console and arm rest, body clips and other small trim pieces
  3. Clay bar body
  4. Cut & polish
  5. Mega Gloss Wash
  6. NDG Hyperseal treatment
  7. NDG Acidic engine bay degreaser and pressure clean
  8. Replaced radiator and thermostate
  9. Replaced idler pulley, tensioner and belt (inspected timing belt)
  10. Replaced ABS pump and switch
  11. Cleaned spare wheel well and installed new spare wheel
  12. Carried out NDG Headlight restoration process
  13. Changed engine & transmission oil and filters
  14. Removed all seats, cleaned with NDG Bio Crystal Magic and removed stains from carpet
  15. Replaced Drivers seat, centre console and armrest and steering wheel
  16. Finished off  engine bay with NDG Engine lacquer
Hyundai Tucson makes a solid come back
Donor car found
Hyundai Tucson makes a solid come back
Removal of the interior to clean the years of nicotine smoke and clean the carpet

The results 4 days later

According to the owner: “Simply amazing, the car looks new, cannot believe it, you sure it is the same car?”

Hyundai Tucson makes a solid come back
The perfect straight off the Showroom floor look
Hyundai Tucson makes a solid come back
Picture was taken before the U was added into Hyundai. But look at that shine


Hyundai Tucson makes a solid come back
Paintwork looks great using DIY techniques to apply NDG Hyperseal
Hyundai Tucson makes a solid come back
This image says it all. LIKE NEW!
Hyundai Tucson makes a solid come back
NDG Headlight DIY restoration/rectification processes worked perfectly
Hyundai Tucson makes a solid come back
Fingernail scratching eliminated and replaced with that Newly painted look and feel. Hyperseal treatment sorted this.
Hyundai Tucson makes a solid come back
The seats were blackened through years of exposure to smoking
Hyundai Tucson makes a solid come back
Hyperseal is the perfect plastic restorer
Hyundai Tucson makes a solid come back
The wheel well had a bottle of soda leak into it which had crystalised and discoloured the surface

Hyundai Tucson makes a solid come back  

In summary

The car is a new as it will ever look and considering that everything done to the car was all done as DIY techniques just as it would in any driveway anywhere. We have worked hard to ensure that NDG products are truely DIY and that you can tackle projects as deep as this and get a great result.

This Hyundai was a great project. It was in a very bad way when we received it and there were doubts as to whether it could be restored, but 4 part days later we got not just a great result we got a perfect result. The car looks close to new condition, and smells just like a new car would with our soon to be released odour neutraliser which installs that showroom new car smell. Keep and eye out for that one as we will be launching it in November 2018.

Hyundai Tucson makes a solid come back
Yep,,, Looks new again
Hyundai Tucson makes a solid come back
The perfect finish

End

Copyright ©2018 Nano DG Singapore Pte. Ltd. All Rights Reserved


DIY Head restoration/rectification

DIY Headlight restoration/rectification

Headlight restoration kits are available everywhere and are priced to motivate the DIY market to buy and try their luck on getting the desired result, clear headlight lenses. The problem is that most if not all of these kits give a great result but it is short lived.

The issue with headlight lenses that once they have been restored with a quick and easy DIY headlight restoration kit is that you cannot use them a second time and expect a good result, in-fact you can very easily destroy the lens. The legacy of using these kits is that in the preparation process you sand to etch the crazing/discolouration off the lens before applying the clear-coat.

The grit is pretty course that leaves deep sanding etching in the lens.  This etching is where the challenge begins as it is very hard to get a clear lens on a 2nd restoration and even harder to get a restoration to last the service life of the car.

Typical headlight issues that occur after an off the counter DIY headlight restoration

  • Hazing
DIY Head restoration/rectification
Hazing
  • Crazing
DIY Headlight restoration/rectification
Crazing
  • Severe Etching
DIY Headlight restoration/rectification
Severe etching

The NDG Process.


What you need

  1. Bucket of clean water
  2. Waterproof gloves
  3. Chamois and 2 x micro fibre cloth pieces
  4. 1 sheet of 400 grit Wet & Dry cut in to 10cm * 10cm pieces
  5. 1 sheet of 800 grit Wet & Dry cut in to 10cm * 10cm pieces
  6. 1 sheet of 2500+ grit Wet & Dry cut in to 10cm * 10cm pieces
  7. 5ml of NDG Hyperseal or NDG shield 120 or NDG Screen Shield

Here is what to do

Starting with 400, wet one piece and starting on the most etched damaged area on the lens start sanding in a linear motion with heavy pressure and insuring the 400 grit stays wet but dipping into the water to clean and keep wet.  Change 400 grit pieces when sanding effect is diminished.

Keep sanding until the scratching noise reduces significantly and the residue starts to turn white. Wipe the lens to see how it looks and that the major scratching has been reduced significantly.

Using 800 grit with the same process and hard pressure keep sanding the entire lens wiping clear occasionally to see the clarity of the lens. Keep sanding and clearing until the lens looks very clear when wet.

Using 2500 grit and using the same methods as the other grits you start the finishing process. Keep sanding and wiping until no visible etching, crazing of disscolouration. Wet the lens with clear water and wipe down to check on the clarity and quality of finish. (if you need to touch up areas start the process of the more agressive grit papers as required)

Once you are satisfied with the finish wash the lens with water and prepare a clean piece of Microfibre or other lint free cloth and apply a small amount (coin size) and wipe onto the entire lens.

Leave Hyperseal to settle for 3 to 5 minutes before buffing clear with a clean mocrofibre or other lint free cloth or a buff machine with a soft pad.

Now your lens will be good for several years, if not longer. Recommended best practices is to apply Hyperseal to the lens every 2 to 3 years to ensure continued protection.

DIY Headlight restoration

Copyright ©2016 Nano DG Singapore Pte. Ltd. All Rights Reserved

This function has been disabled for NDG PRODUCTS.